Saturday, September 8, 2012

Allergy - Free Zucchini Bread

After making the Brown Rice Cream the other day, the first thing I wanted to do was start experimenting! Luckily, these days I'm at no loss for inspiration thanks to the array of cookbooks in my "to-review" pile, and when I found a recipe in Colette Martin's Learning to Bake Allergen-Free: A Crash Course for Busy Parents on Baking without Wheat, Gluten, Dairy, Eggs, Soy or Nuts
that used both rice milk and the dirt-cheap zucchini the local farmers were trying desperately to sell at the market I knew immediately I had to try it out.

Since the book only called for a vague "gluten free flour blend", I opted to make my own mixture instead of going out to buy a premade one. Not only was this a cheaper option (since I have an arsenal of flours in my pantry) but I find the commercial mixes to be very "bean heavy" and dense in most baking applications. I added a dash of cinnamon and cardamom to the batter too, since there was no spice at all in the original recipe, and since the finished loaf was still more of a a "white" or "vanilla" cake that happened to have zucchini in it than your standard spice-laden quick bread I added a cinnamon-sugar drizzle for a bit of extra "oomph".  
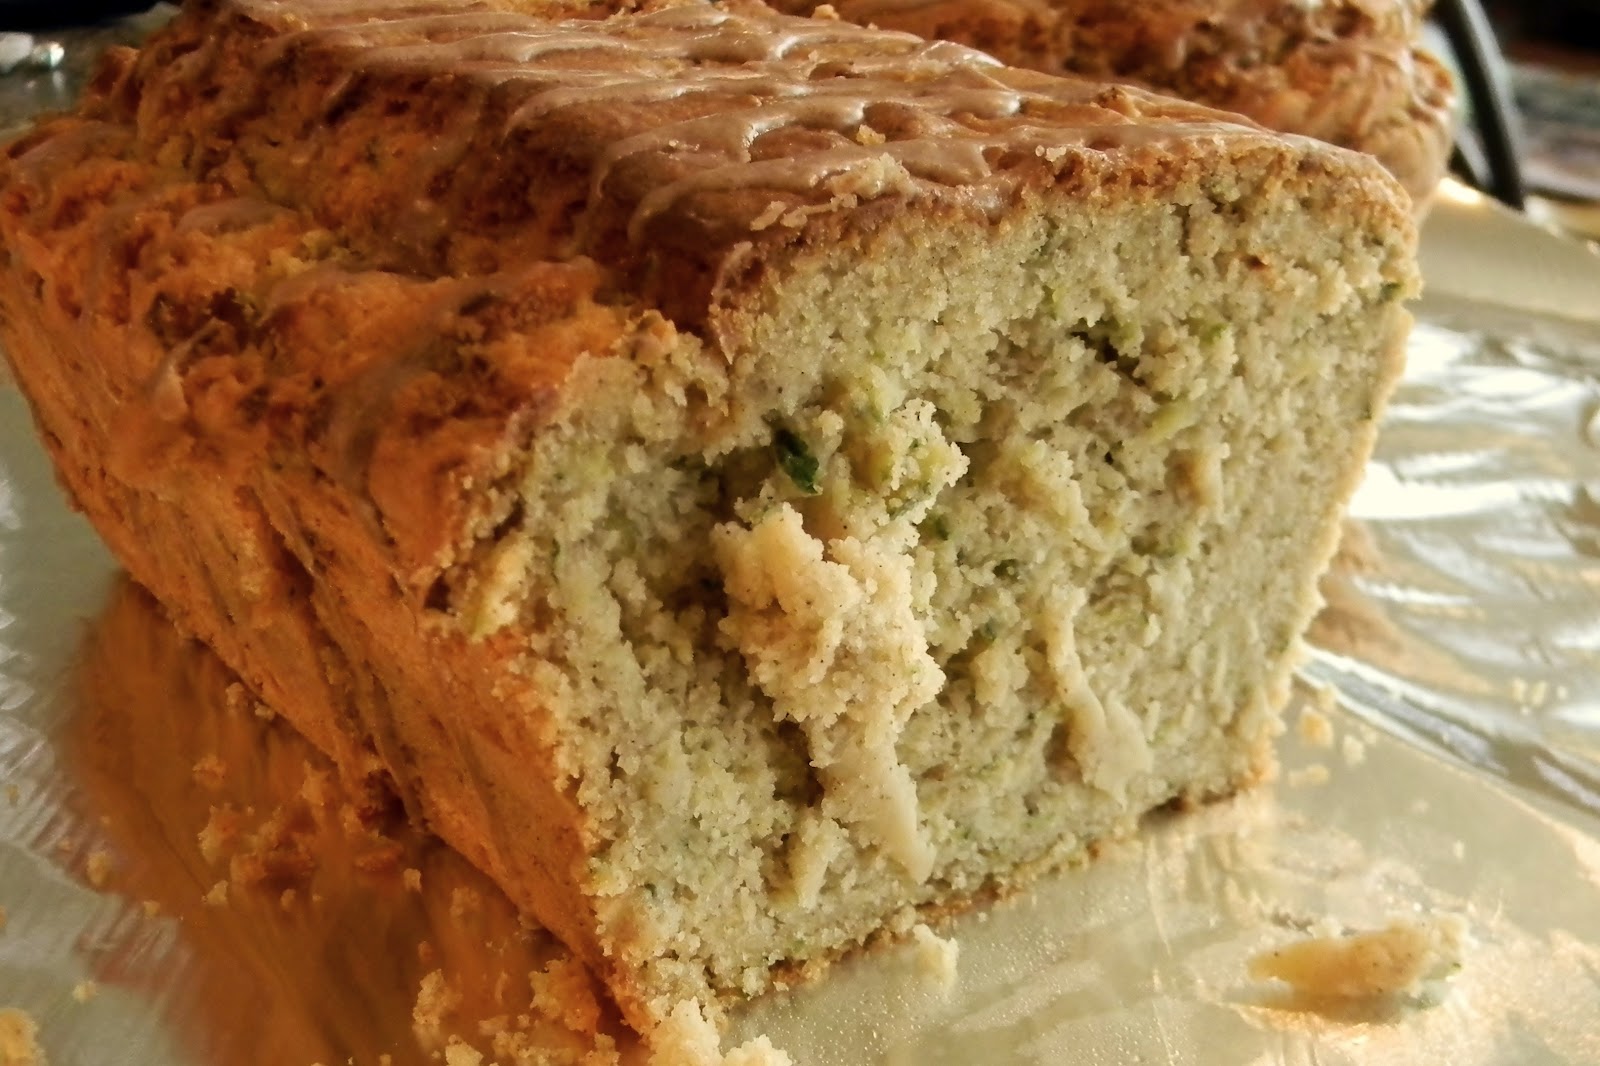

In the end, all the little tweaks and twists I made coupled with an already fantastic formula to create a truly delicious dessert. The girls at my hair salon whom I served it to told me that they'd never know it was allergen-free if I hadn't said anything - and a few of the ladies who had children at home loved that the only real indication of the vegetable at all were the green flecks, which can be eradicated by simply peeling the zucchini!

Allergy - Free Zucchini Bread
Serves 12
2/3 cup chickpea flour
2/3 cup sorghum flour
2/3 cup brown rice flour
1/2 tsp guar gum
3/4 cup sugar
1 tbsp baking powder
1 tsp salt
1/2 tsp cinnamon
1/4 tsp cardamom
pinch nutmeg
1 tbsp enerG egg replacer (or 2 eggs, eliminate the water)
1/4 cup warm water
1/2 cup canola oil
3/4 cup rice milk (I used my Brown Rice Cream)
1 tbsp pure vanilla
1 large zucchini, finely shredded

Glaze:
3 tbsp icing sugar
1/2 tsp cinnamon
1 - 2 tsp water

  1. Preheat the oven to 350F and grease a 9x5" loaf pan.
  2. Whisk together the flours, guar gum, sugar, baking powder, salt, cinnamon, cardamom and nutmeg, set aside.
  3. In a large bowl, beat together the egg replacer powder, water, oil, rice milk, and vanilla until well combined.
  4. Beat in the flour mixture until smooth, then add the zucchini and beat in.
  5. Bake 55 - 60 minutes. Cool for 30 minutes in the pan, then carefully un-mould onto a wire rack and cool completely.
For glaze:
  1. Whisk together the icing sugar and cinnamon, then drizzle in the water until a thick but pourable mixture is achieved.
  2. Drizzle over the cooled cake and let set. 

Amount Per Serving 
Calories: 226.0
Total Fat: 9.9 g
Cholesterol: 0.0 mg
Sodium: 201.0 mg
Total Carbs: 32.6 g
Dietary Fiber: 1.8 g
Protein: 3.0 g
 

Linked to #glutenfree Fridays Recipe Party #4

Wednesday, September 5, 2012

Brown Rice Cream

Some of the time I see recipes that look amazing in every way except that they call for some sort of cream. A lot of the time the people I bake for can't have nuts or gluten either, and since I drink almond milk usually buying a whole carton of the less allergenic rice milk is cost prohibitive - especially if the recipe calls for only a half cup or so. We do, however, buy a lot of brown rice around here, and we always have leftovers when my mom makes stir-fries. Rather than throw out tons and tons of it, or let it go rancid (the stepfamily doesn't believe in leftovers and apparently has never heard of fried rice), I figured I'd do something useful with it and create a cream substitute at the same time.

Unlike the more watery commercial rice milk, this version is as thick as heavy cream and works in any baking application requiring it. It doesn't whip, obviously, and I haven't tried it in caramel making yet but it's on my to-do list! My guess is that for caramel adding a tablespoon of coconut oil to the finished "cream" would prevent it from curdling. If you'd rather drink your rice milk, simply dilute the finished cream to your preference!


Brown Rice Cream
Makes about 2 cups of "cream" which can be diluted for a beverage if you like
1 cup cooked brown rice
3 1/4 cups water, divided
pinch salt
1 vanilla bean, split (optional)
1 packet vanilla-flavoured stevia (optional)
1/4-1/2 cup additional water
  1. In a saucepan, bring all the ingredients to a simmer.
  2. Partially cover and cook, stirring occasionally, for 40 minutes. Remove the vanilla pod if using.
  3. Scrape/pour mixture into a blender, add 1/4 cup water and puree until completely smooth.
  4. Add the additional 1/2 cup water if necessary to blend - it should be liquid but thick.
  5. Let stand 45 minutes - 1 hour.
  6. Line a strainer set over a bowl with cheesecloth and pour the blender mixture in. Let drain, discard the solids.

Amount Per Serving (1 cup)
Calories: 108.0
Total Fat: 0.9 g
Cholesterol: 0.0 mg
Sodium: 5.0 mg
Total Carbs: 22.4 g
Dietary Fiber: 1.8 g
Protein: 2.5 g

Linked to #glutenfree Fridays Recipe Party #4

Tuesday, September 4, 2012

Olive Semi - Sourdough Boule

One of  the last "great hurrah's" of Summer my mom and I share is our farmer's market circuit. We usually start off fairly tame and close to home, checking out the two that happen to run weekly in our town, and they're a great place to pick up the produce that we'd normally be shelling out for at the supermarket. Granted, it's not always a cheaper option, but the quality and experience is more than worth the extra dollar. Plus, there's always samples!

But we'd be missing out on a lot if we didn't get down to our two favourite Toronto markets at least once a Summer too. First off, we head on down to the Brickworks to see what's on offer from Vicki's Veggies, the cheese purveyors from Best Baa Dairy and Monforte Dairy, and buy probably my favourite mushrooms ever at the Fun Guy Farm stall. Even though it's usually only about 10AM when we leave there, I still always make sure to get my stevia-sweetened lemonade too - it is way too good to pass up and it's only once a year!

After our jaunt to the Brickworks, the normal progression of events is to head on down to the city centre to visit the most famous of the Toronto markets - the St. Lawrence! We love it for their delis (especially the pickles at Scheffler's!) and their huge assortment of fish and seafood, fresh and looking just as good as when the boat brought them in. But downstairs, mom's resolve is tested in no small way! That's where you'll find Stonemill Bakehouse's shop, and when you first walk into the vicinity the aroma that hits you is nothing short of divine. Because the bread (and pastries!) are just that good, if you don't swipe up what you want at the beginning of the day, you're likely leaving without it at the end.

That's exactly what happened to my mom, which (as she put it) was a blessing in disguise since otherwise she'd have left with the whole store! After having been tempted by the (apparently) amazing olive loaves at St. John's Bakery in the Brickworks (I say apparently because I've never tried it, abhorring both olives and cilantro!), and finding none at the St. Lawrence, she still couldn't get it out of her head a week later! I decided that I'd make her one that would be a little less guilt-inducing than an all-white flour loaf but with all the flavour and texture of the artisan creation. Whole wheat bread flour and a little sourdough starter was my jumping-off point, which I added cornmeal, potato flour, an instant yeast booster and some honey to before packing it full of olivey goodness with the fruitiest olive oil I could find in the house along with two types of olives. About half the total olive content was your standard deli Kalamatas, the rest were dried Botija olives that I found on the olive bar packed in olive oil. It was a royal pain to pit them all (once I found out that the "pitted" and "with pits" sections in the olive bar at the store had been mixed up) but the end result? Gold.

I mixed up a fairly moist dough with the simple ingredients and decided that it would fit best as a boule, to maximize the crust potential. I also opted for a bit of steam in the beginning, and if my pizza stone hadn't broken the last time I tried to heat it to 450F I would have used that! Even then, the loaf came out looking and smelling like any other artisan bakery's offering, and according to my mom it was my best loaf yet!


I'm sending this to Susan's YeastSpotting event this week as well as this month's Bake Your Own Bread round-up, and humbly suggest you use Sunday's Tomato Confit to enjoy it!


Monday, September 3, 2012

Very Red Velvet Brownies

So, do you have your Labour Day dinner plans all set out? BBQs? Picnics? Sports events? Avoiding the whole shindig all together because oh-my-goodness-school-starts-tomorrow-and-I'm-still-working-on-yesterday? As far as I can tell around here, especially given our lack of air conditioning situation right now, we'll probably be sweating it out over grilled something on the back patio. Regardless of what you're doing, it's a great day to enjoy just being off of work for a Monday and spending time with your family. And you know food (ideally with minimum work) is going to be involved!

Dessert is often left to the local ice cream shops, grocery store bakery departments or eschewed all together for Summer "do's", especially when it's still hot and sticky outdoors and everyone's avoiding the stove like the plague. But those options aren't necessarily great for the September-though-Fall waistline either, if you (like so many of us) have been indulging in one too many ice cream sundaes, lemon squares or cocktails over the season. I can't call something a meal without a little something sweet, though, and you do need something a little decadent to enjoy with your fresh fruit salad (especially when there are kids around). So I suggest something classic, bittersweet and well loved all over - brownies! Specifically, red velvet brownies.


But wait, didn't I just say all that stuff about healthiness and speed and ease? Well, yes. But these are all those things - and you can even bake them in a toaster or convection oven so you're not boiling up the whole house! These brownies are not only gluten free, refined sugar free and nut free, but they're vegan, packed with nutrients and under 120 calories a piece! I was inspired by a recipe from a transplanted fellow Canadian - Kris of Munchin with Munchkin - and changed it up to use leftover cooked adzuki beans, roasted beets, raspberries and fruit laced chocolate chips as well as cutting the sugar down with stevia and lessening the "grainy" texture of using all flax-meal as a flour. The result was fudgy, slightly fruity and while my mom loved them (mostly because she loves chocolate anything, and fruity chocolate even more), even the "butch", doughnut and pizza guys at my stepbrothers' mechanic shop proclaimed them delectable! I didn't tell them what was in the mix though (and I suggest that unless the kids eating these - and they will - are used to "healthy ingredients", you do the same), but the empty tray spoke for itself!

So they're healthy, we know that. But what about easy? And avoiding the kitchen? And enjoying outside while the living's still good? Well, I have an answer for that too - the food processor. No need to pre-whisk dry and wet, just puree the beans, beets and berries, throw in the cocoa, stevia and sugar, then follow it up with the remaining ingredients. Voila: one (dishwasher-safe) thing to clean, no muss no fuss!

I'm sending these incredibly yummy squares to Ricki's Wellness Weekend this week. Be sure to stp by, say hi and check out the other goodies!

Sunday, September 2, 2012

Toast Topper #8: Tomato Confit for #SundaySupper


I know - another tomato recipe for #SundaySupper? I can't help it - not only do we have some of the most delicious tomatoes I've ever tasted in my backyard, but there's a ton of them and we just can't power through 4 each at every meal! Luckily I did receive a copy of
Tomato: A Fresh-from-the-Vine Cookbook by Lawrence Davis-Hollander to review on my other blog, so I've had no shortage of ideas as to what to do! While I have yet to write up the full review (other work took over my life the last few weeks), I can say that if you grow tomatoes at all, this is definitely a good buy. The only thing it's missing is a good long-simmering marinara sauce, but it does have a roasted tomato sauce that is fantastic - and of course there's the Tomato Confit.

Honestly, I'm still amazed that something this simple creates something so incredible. Essentially cooked in their own juices and a dab of olive oil, it's an easy way to preserve any glut you might have. While easy to put together (especially if you use this tip for easy peeling!), you pay in time - bank on 4 hours or so for perfectly toast or pasta worthy confit. Whatever you can't eat right away (within a month), place in zip-top bags or plastic containers and freeze: unless you have a pressure canner of course, then feel free to can away!

Because they're so versatile, they can be tossed into pasta, with rice, on crackers or good, crusty bread and (of course) on your Labour Day burgers and dogs. Our #SundaySupper group is embracing all things long weekend today, so I'm sure you'll find lots of inspiration below too!

#SundaySupper Labour Day Nosh!

Starters & Snacks

Main Dishes

Salads & Sides

Drinks

Desserts

Wine Pairings

  • Labor Day Cookout Food And Wine Pairings by ENOFYLZ

Please be sure you join us on Twitter throughout the day during #SundaySupper. We’ll be meeting up at 7:00 p.m. EST for our weekly #SundaySupper live chat where we’ll talk about our favorite cookout recipes! Just follow the #SundaySupper hashtag! We’d also love to feature your Cookout recipes on our #SundaySupper Pinterest board and share them with all of our followers!