Monday, April 30, 2018

Two Toned Biscotti

These two toned biscotti are crispy, dunkable and a great combination of chocolate and vanilla-berry flavour.

Two Toned Biscotti

Most people know I have a thing for making biscotti. Every year, the holiday baskets get at least one variety tucked inside, but just because there's no snow on the ground (finally!) doesn't mean the crisp, dunkable cookies are off the menu. I love making the cookies for their ease and versatility - you can have any flavour under the sun, add nuts or not, and making them gluten free, vegan or both is a snap compared to something like cakes or sugar cookies.

The funny thing is, when it comes to eating biscotti, I take a pass. I'm definitely in the chewy cookie camp, and I never liked even dunking chocolate chip cookies in milk, so the whole "dip in your coffee" aspect is kind of lost on me. That said, almost everyone around me - even haters of the gourmet, coffee-shop biscotti - love mine on their own, so I guess I could give them another go some day! One thing I had always wanted to do but never tried was making a two-flavour biscotti. Originally my idea was to make something akin to a marble cake, with random bits of vanilla and chocolate throughout the cookies. However, for simplicity's sake (and because I wasn't sure if the cookies would bake into a cohesive whole) I opted to simply layer the dough, which made for an equally stunning presentation. Rather than go for "plain" vanilla on the bottom, though, I folded in some pulverized freeze dried berries, which added a hint of flavour but no real colour to speak of. In the future, I would definitely leave some of the fruit in larger "bits" for that visual pop, but the flavour is spot on!

One thing I forget about biscotti when I haven't made them in a while is that the initial log does swell and spread in the oven slightly. Layering the slightly heavier chocolate dough on top of the vanilla forced the log to become wider than normal, which was fine but made the sliced fingers very long. To compensate, I sliced each cookie in half crosswise so that it was more manageable, and next time I'd make sure that the log was long and very narrow before going into the oven!

Monday, April 23, 2018

Asian Pear and Cranberry Crisp

Asian Pear and Cranberry Crisp is so easy thanks to a topping of pre-made granola. Its a comforting dessert or (mostly) healthy breakfast!  


Asian Pear and Cranberry Crisp

When Spring rolled around on the calendar this year, I was more than ready to start breaking out the fresh, bright flavours of the season and re-energize my cooking. However, Mother Nature made other plans and gave my sister and I the birthday gifts of ice storms and blinding cold. The awful weather outside, coupled with the end of my university term complete with papers galore and exam week, meant only one thing could possibly be on rotation: comfort food.

When I think of comfort food, I automatically revert back to the autumns of my childhood where, after an afternoon of apple picking, mom (and sometimes us kids) would bake scads of pies, squares and crisps which were eagerly devoured once they feel just below burn-your-mouth temperature. To this day, the combination of warm, juicy fruit and toasty grains makes me feel like curling up in a big cozy quilt with a book or a good Disney classic movie.

This crisp was beyond easy to make from the fruit I had on hand, and was the perfect blend of sweet, tart, nutty and grainy. I love the sweet, crisp, juicy bite of Asian pears (especially the brown "Korean" pears) and always stock up when they look their best at the store. However, some weeks my eyes are bigger than my stomach, and they sit in the fridge becoming just a little too ripe for me to enjoy out of hand (I'm picky!). However, they have lots of life left, and rather than turn them into sauce or leather (two of my other favourite "use ups") I peeled and chopped up the stragglers, tossed them with fresh cranberries, a bit of sugar and some spice before finally topping the works with a bag of pre-made granola. Granola - whether homemade or store-bought, is by far my favourite "cheat" ingredient for crisps - you don't need added butter or sugar, most already have a good mix of grains and other crunchy "bits" for texture, and it's sturdy enough that it won't sog out or burn up in the baking process. Now, I will never knock my mom's crumb mixture for her apple squares - that stuff is legend - but for a weeknight dessert? This hits the spot.


Asian Pear and Cranberry Crisp

Tuesday, April 17, 2018

Only Oats #CreativeCookieExchange

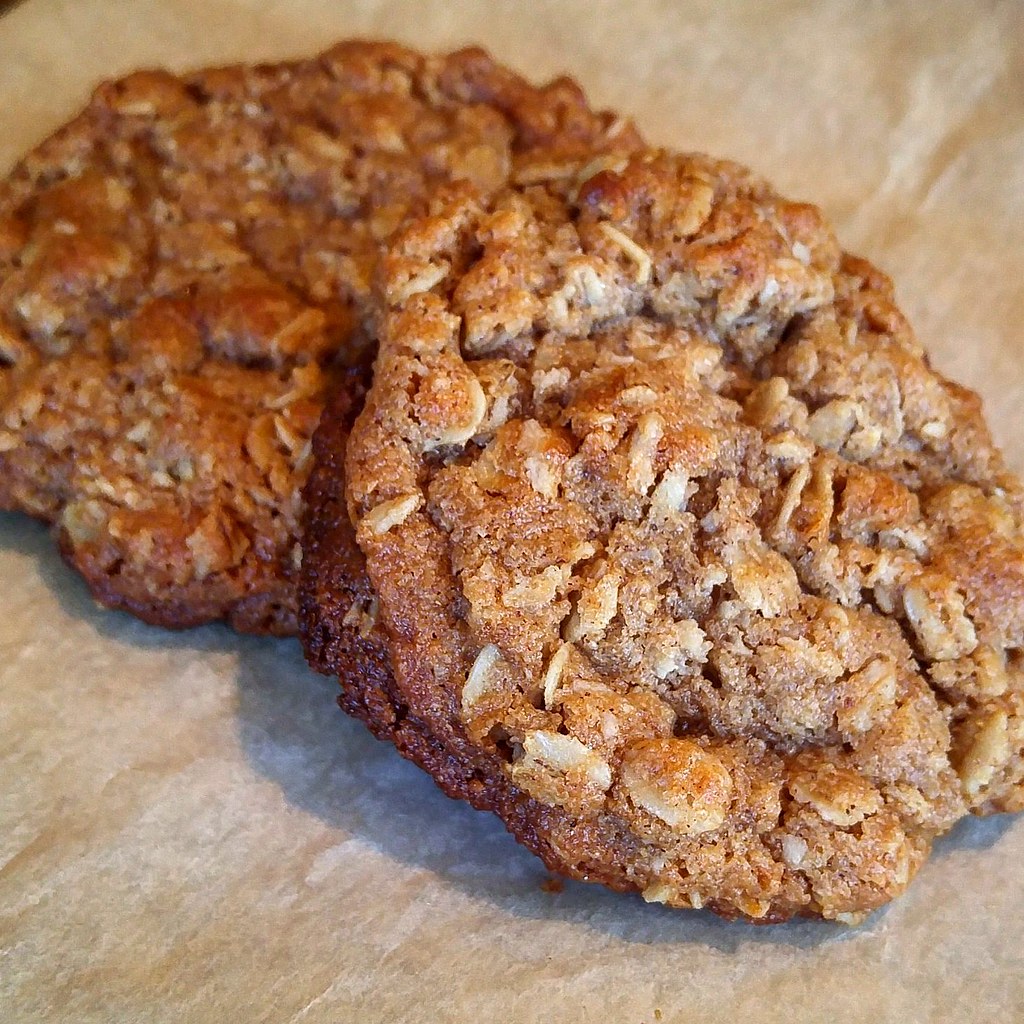
Only oats go into the "flour" of these chewy cookies adapted from Alton Brown. Perfectly sweet and buttery, they're a great after school or lunchbox treat!

Only Oats


Being a private school kid since age 3, I was fortunate enough as a kid to have my grandparents watch me before and after school for years instead of being stuck in daycare or with a babysitter. My grandfather, who drove right up until he passed away, would pull the "after school" chauffeur shift for my friends (their next-door neighbours) and I, while their mom (who was a school administrator) took us in each morning. It was a pretty good deal, if I do say so myself, especially since every so often Grandpa would take a wide detour and we'd wind up at the Dad's Cookie outlet and bakery.  Dad's was not a brand of cookie found on store shelves everywhere - the Christie-owned name is a completely different animal - and any cookies I can buy today don't hold a candle to those fresh-baked ones of my youth. We always had a choice of chocolate chip or oatmeal when we pulled up to that non-descript warehouse, but Grandpa and I never had to think about it - the soft, chewy oatmeal cookies were winners time and time again.

When I switched schools in grade 3 and my grandparents moved to east of the GTA, our cookie runs stopped. I tried a couple "storebought" brands of oatmeal cookies to get my fix, and even helped my mom make a batch or two, but I was always disappointed. The cookies were hard, too flat or too cakey, tasting of sugar rather than oats, and the grains themselves were often sharp, jagged health hazards waiting to happen. For a while, I tried finding my ideal oatmeal cookie recipe on my own (documented way back on this blog) but again, I couldn't clinch it.

Enter Alton Brown.

I am unabashedly a huge fan of Brown's shows and recipes. I chalk this up to being a closet major science geek (and the daughter / sister of less closeted science geeks), because I love understanding what the purposes of each ingredient in a recipe are and how to maximize their potential. In the case of these cookies, AB went all the way to ensure the oat flavour was dominant: he used only oats as the grain. No wheat, rye, spelt, barley, rice or other grains contaminate the pure goodness of the oats here! In addition, the large-flake oats are toasted, bringing out a lovely nuttiness. A butter and brown sugar mixture adds a lovely caramel note and chewy texture to the cookies without smacking you over the head with tooth-aching saccharine flavour, and only the merest hint of cinnamon and nutmeg are there to accent the entire works.

Only Oats

Sharp eyes will notice a few variations between my recipe and 
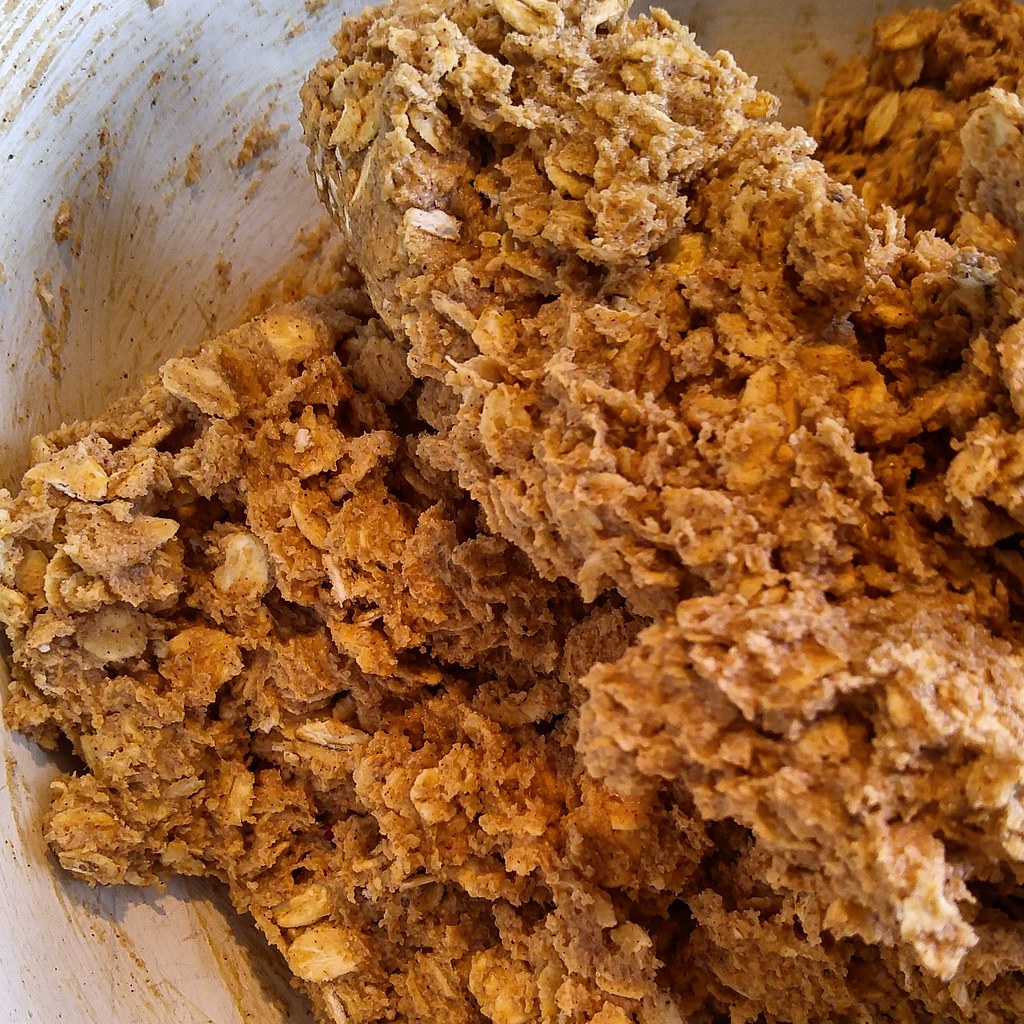
AB's. First, I had some home-ground oat flour sitting in my freezer, so instead of toasting a whole batch of oats and grinding half, as in the original, I substituted the weight ground for the oat flour. Second, I used salted butter - it's what we always have in stock at home and what I'm used to working with (although I recently made some luxurious buttercream frosting with high-butterfat unsalted butter and am dying to try shortbreads with it). Last, and I believe most crucial to my success, I chilled my dough overnight. This allowed the oats to hydrate, eliminating the glass-shard phenomena, and also helped "glue" the cookies together so they didn't spread all over the parchment. Since these cookies are gluten free in essence (I use certified GF oats), and don't use a gum to bind, any chance to let the pentosans work is welcome. On that note, parchment (I swear by PaperChef) or SilPat is an absolute must with these guys - a greased cookie sheet equals tortilla-flat cookies that burn, while not greasing results in cookies burned onto the sheet in places and overly gooey in others. Take my advice: parchment saves so much frustration.

The resulting cookies checked all the boxes for me: chewy, just enough softness, sweet without cloying and above all, oaty. The only thing missing was the Beach Boys playing in my grandpa's minivan, and of course the man himself next to me munching away like the kid inside all of us. I write about my grandpa a lot on here, but he and I shared a lot of time, music and food together, and recipes like these keep those ties close.

Do you ever cook things that remind you of childhood? What's your favourite childhood food story?

The #CreativeCookieExchange is baking with WHOLE GRAINS in April and we’d love for you to join us! The possibilities begin with whole wheat and oats, but maybe you’ll find a new grain to bake with in your kitchen such as quinoa, amaranth, or buckwheat!


You can also use us as a great resource for cookie recipes. Be sure to check out our Pinterest Board and our monthly posts (you can find all of them here at The Spiced Life). You will be able to find them the first Tuesday after the 15th of each month! If you are a blogger and want to join in the fun, contact Laura at thespicedlife AT gmail DOT com and she will get you added to our Facebook group, where we discuss our cookies and share links.

If you are looking for inspiration to get in the kitchen and start baking, check out what all of the hosting bloggers have made:
Amaranth Lemon Cookies from A Shaggy Dough Story
Buckwheat Toffee Cookies from Food Lust People Love
Loaded Homemade Aussie Bites from A Baker's House
Only Oats Cookies from What Smells So Good?
Rye Chocolate Chip Cookies from Karen's Kitchen Stories

Wednesday, April 11, 2018

Chocolate Scotch Eggs

These Scotch eggs are gluten free, nut free and super chocolatey! Who says Easter is over? No Creme Eggs? The brownies are divine on their own!

Chocolate Scotch Eggs

Ever since one of my co-workers made "real" Scotch eggs for a lesson on the layers of the earth (practical geology!), I've been fascinated with the sweet version. The combination of Creme Eggs and brownies has always been more palatable to me than the traditional deep fried hard boiled egg / sausage concoction - I am not a fan of eggs in general, and hard boiled eggs and I have never gotten along well. Creme Eggs, though, were my kryptonite every Easter as a kid - I would find exactly 3 "regular size" eggs hidden amongst all the other "standard" milk chocolate eggs and knew I had to make them last. This was an issue because back then, Creme Eggs really were only around until Easter, when they disappeared for another 11 months. It was definitely a bittersweet experience, especially since Easter usually coincided with either my sister's, my dad's or my birthday, meaning that we got less candy from the Easter bunny because "he knew we'd get lots of chocolate from home".

Eventually, not only was the Creme Egg "season" extended beyond a month, but Cadbury started coming out with miniature versions of their super-sweet classic. The great thing with the mini eggs was that you didn't get a massive sugar rush after having one or two, but they still killed that craving. Even better was their texture when frozen - the fondant melted slowly and completely rather than getting caught in the back of your throat, and it took longer to eat them so they lasted longer. When I found a bag of the British version (sorry, they're better) in with the "last chance before Easter" bin at the store, I snapped them up with the sole purpose of turning them into Scotch eggs. 

Some of the recipes I had found online called for full-size Creme Eggs to be covered in the brownie "cake pop" dough, but that just seemed extremely excessive - I, a bona-fide Creme Egg (and brownie) lover, would never be able to finish one, so I was not about to expect others to! The mini eggs, once covered in the brownies and graham crumbs, fit perfectly in an egg carton and were a perfect dessert size. As I was making them for a gluten free friend of mine, I was thrilled to find that the UK Mini Creme Eggs are GF (sorry, domestic CE, you need to step up your game). I whipped up a batch of basic, cocoa-based GF brownies and got to work. They looked fairly close to "real" Scotch eggs (smelled a lot better though) and the brownies that didn't become coating were enjoyed by two of my other pals. Even though Easter was over, and it was my birthday party, I couldn't think of a better way to celebrate!

Do you bake or cook for others on your birthday?

Friday, April 6, 2018

Crazy Cakes

Vanilla and chocolate wacky cakes are super simple, delicious and completely vegan, perfect for birthdays!

IMG_20180405_125727_985

Full disclosure – I had intended to write and post this recipe earlier this week – as in, on my birthday (Wednesday) – but by the time I got around to looking at my computer and editing photos and whatnot, it was about 11PM and I couldn’t think of a single word. Luckily, the cakes were much easier to make – and since I did wait I was even able to take some photos of the decorated pieces. Every year for my birthday, my Home Ec classes get to decorate cake as a little fun activity. Home Ec isn’t exactly a hard class, but there is generally more work involved than maneuvering a piping bag – and as an added bonus the kids get a hit of sugar in the middle of the afternoon when they’re dragging (and I get to send them home right after – sorry Mom and Dad!).

This year, though, instead of me making the cakes for every class, I had my grade 7 and 8 groups make their own cake to decorate. In my classroom, we have very little in the way of electric appliances (case in point, I have to bake everything at home). Cakes, therefore, have to be simple and minimal effort – one bowl, a few measuring cups and a whisk or spatula is ideal. Since this group is relatively good in the kitchen, following recipes and even cleaning up after themselves, I gave them the option of making chocolate or vanilla wacky cake. They chose one of each, which worked for me!

One of the things I love about wacky cake is that it’s really easy to make them allergy-friendly. We have a few vegetarians, one vegan and a few dairy and egg allergies to cater for in that class, so with the recipe already being egg-free it only took a swap for the milk for everyone to enjoy. I chose a type of non-dairy milk that I’ve never used before – pea milk – which has a rich flavour and milk-like texture with no “beaniness”, even when unsweetened and unflavoured. The kids gave me a bit of a side-eye when I opened the bottle, but the resulting cake was met with nothing but praise.

The only downside of a cake this easy is that it’s far too simple to make a lot of them! While the kids were excited about being able to decorate big pieces of cake, the decorating icing turned the multipurpose room into a veritable Jackson Pollock painting. Luckily food dye washes out – eventually!


Wacky Cakes