Showing posts with label Special Occasion Recipes. Show all posts

Saturday, April 3, 2021

Golden Miniature Panettones

These golden, pillowy Mini Panettones are studded with dark chocolate, Craisins and pistachios and full of orange zest for an irresistibly festive flavour. They're rich and sweet with a secret ingredient that makes them even more special! 

Well, it's Easter weekend - and for the second time, both the Easter Bunny's visit and my birthday are being spent in lockdown. I shouldn't complain though, it isn't like I'm one for parties or bar-hopping, but it would be nice to actually grocery shop without the 45 minute lines again! This birthday is also being spent with limited baking potential, since I'm still relatively useless when it comes to hauling buckets of flour and bowls of dough here and there thanks to the car accident. So, rather than showcase a spiffy cake this year (though one may be forthcoming...) I'm going to share a festive bread that I made last Christmas and forgot to post about! Don't worry, I haven't forgotten the experience, or the reactions from the family I shared it with. Besides, panettone seems to crop up at our household on the Easter weekend as well, so let's say it's still seasonal!

I will admit, I've always wanted to make this form of bread to see just what is so special about it - having a vast Italian stepfamily and working with a few others who love the stuff, its ubiquitous every holiday. One year we had 4 large ones in our pantry thanks to gifts from family and friends! Because we had far fewer people dropping by last year, I decided to try out a recipe that could be made rather easily in miniature form using jumbo muffin tins and a few ramekins, and just so happened to be vegan, but that would be no less decadent. My inspiration came from a carton of Coconut Nog that I picked up at the discount grocery, which seemed like it would add not only flavour but richness to the dough. To make up for the missing "eggy" colour, a pinch of turmeric sufficed. The dough came together like a dream and was satiny and soft like my mom's Brioche dough is. Then I debated fillings.

Given that my mom was one of my taste testers, I knew there had to be chocolate in there somewhere. I mean, how can you go wrong? After that, I looked to my stash and after finding my bag of shelled pistachios in the freezer it hit me - holiday colours could be had by adding Craisins too! I will admit that I measured these rather loosely, so my amounts below are a guide, but each little loaf had a generous amount of each component.

Now, sometimes little loaves are not what you need, but I have you covered with this nutty, citrusy, sweet bread recipe - it's absolutely translated into a large loaf pan and I give baking times below. Either way, I don't think it's fair to keep this as a holiday only affair - who's to say a Saturday morning isn't cause for celebration?

Saturday, November 21, 2020

Norwegian Butter Cookies

You can't beat a great butter cookie - and these Norwegian Butter Cookies are some of the best! Using a high-fat European style butter is crucial here since you taste it in every bite, and the tiniest bit of almond extract rounds out the whole thing. Beware, they are addictive!


It's generally held in my family that the best butter cookies belong to my mom - no ifs, ands, or buts, if we buy butter for baking between November 1st and January 1st, its almost exclusively earmarked for shortbreads. However, the type of butter we buy for those perfect cookies is (almost hilariously) specific, and pedestrian. I am not kidding - the fanciest we get for those cookies is the ubiquitous grocery store staple butter, if not the "no name" discount brand. We have tried "fancier" or more expensive brands, but none of them work quite right.

That said, I am a sucker for gourmet ingredients every once in a while, and when I was at the farmer's market last year (yes, pre-COVID) I splurged on a $6, 8-oz brick of high fat, European style butter. I originally planned to make croissants with it, but life and school and work got in the way and I wound up tossing it into the freezer and admittedly forgetting about it. Only when our fridge freezer's door guiderails broke and we had to de-bulk the baskets to try and lighten the load did I "rediscover" it - still in it's own little zip-top bag and foil wrapping. Since the holidays are coming nigh (though I think I am dangerously overloaded with cookie dough at the moment) I decided to try out another recipe from my mom's Reader's Digest Recipes from Around the World (the one this lovely loaf and these cookies came from) for Norwegian Butter Cookies.

Now, what makes these Norwegian, I cannot tell you. Is it the almond extract? No clue. What I can assure you is that there are absolutely no trolls or maelstorms in these tender, decadently rich yet simple cookies! You absolutely taste the butter in every bite, so unfortunately skimping on the quality / butterfat will not do you any favours here, and because they are so spartan in their ingredient lists it really is key to make sure every single ingredient is the best it can be. It sounds ironic to be harping on quality ingredients when there is also shortening in the ingredients list, but I believe that it's inclusion (and I used a good quality, non-hydrogenated brand) helps the cookies from becoming too flat or greasy. The cookies I made are not lily-white either, as the vanilla I used is naturally dark and I opted for unbleached flour, but when it comes to taste who cares?

I will have far more cookies coming to the blog in the next few weeks, but suffice it to say these are some of this year's favourites! 

Wednesday, August 26, 2020

Gnocchi with Caramelized Onion, Duck and Mushroom Gravy

Sauteed homemade gnocchi gets topped with a rich caramelized onion, duck and mushroom gravy. Paired with roasted vegetables (from last night's roast duck) it is a hearty, filling meal for N after a long day!

Is it seriously almost September? While I haven't set foot in a (physical) classroom since the beginning of March, I feel like I never stopped working between remote teaching and remote university courses. However, the calendar doesn't lie, and while it isn't cold yet, we seem to be settling into the comfort-food mode faster than ever around here.
 
The last time N came over, I asked him if there was anything in particular he wanted for dinner. He absolutely loves duck, and while I couldn't find a duck breast at the store I did come away with a whole bird for a decent price and roasted it on a bed of veggies for one night's dinner. Being, well, me, I had planned for leftovers by making the gnocchi I posted yesterday and picking up a handful of ingredients with the idea to make a caramelized onion and mushroom sauce of some kind. I am a sucker for caramelized onions and mushrooms of all kind, so my brain went on a single track to those flavours! After running the idea past N (he loves French onion soup so he jumped on it) I started thinking of flavours - the thyme I used in the roast duck was mirrored in the gravy with a little rosemary to offset the mushrooms. A little honey amplified the sweetness of the onions while smoked paprika added smokiness that bacon would add (I didn't have any and it would have been too fatty for this recipe anyway). To thicken the gravy, I used a staple in my (and my mom's and my grandma's) pantry called Veloutine, which is essentially an instant starch thickener made by Knorr. If you can't find it (I only found it on the Canadian Amazon site), a cornstarch slurry would work fine! The resulting sauce/gravy is thick, glossy and a perfect foil for the crisp gnocchi.

A few notes for those wanting to make this like I did. I highly recommend you start with a roast duck with plenty of salt, pepper and thyme over a bed of hearty vegetables like carrots and parsnips (even a utility duck will work for this purpose, and they are cheap!). After the duck finished roasting, I strained all the juices into a glass measuring cup and refrigerated it. The creamy, soft white fat rose to the top in a disc which I removed and used part of for the gravy, and the concentrated, almost gelatinous liquid on the bottom became the duck stock when mixed with a little water. Of course, if you are using a cooked duck breast (or another game bird) and don't have access to these flavourful ingredients, I would suggest either store-bought duck fat and a rich chicken bone broth or, in a pinch, butter and bone broth. If you only have chicken stock, I suggest simmering it with dried mushrooms and a scoop of collagen powder (if you have it) for an hour and straining it to add some rich flavour.

Also, if gluten is a problem, the sauce is completely gluten-free - swap in your favourite starch (polenta or mashed potatoes are always good) or use gluten free gnocchi!
 

Wednesday, July 1, 2020

Cinnamon Spice Cookies with Goldschläger Icing

It's never out of season for gingerbread when it is this perfect! These cookies are packed with spices and laced with Goldschläger for an extra cinnamony kick. Topped with a simple powdered sugar icing and some silver sparkles its enough to make you feel like royalty, even if its just Wednesday night in your PJs!


Happy Canada Day to all my Canadian readers! Like pretty much every holiday this year, my country's 153rd birthday is passing with relatively little fanfare - even our neighbours who usually go all out with fireworks aren't planning anything. In addition to Canada Day, today also marks my blog's birthday - a whopping 13 years old! I still can't believe I've been documenting my cooking adventures for that long, and this blog has followed me through a whole mess of life journeys - five rounds of schooling, multiple jobs, relationships, losses of family and pets and multiple medical segues.

I want to just take a moment, before diving into my celebratory recipe (from our provincial liquor store) to thank everyone who has supported me over these years, including all the sponsors who gave me a chance, the various publishers who collaborated with me, my family, friends and the blogger community at large. You have all helped me become the cook I am today, and while I may not be the most regular writer, being part of this community of like-minded foodies showed me I could belong somewhere. I plan to keep this bad boy (or girl) going for as long as I can, especially now that my team of taste-testers has grown to include both N and my sister's boyfriend D.


Moving on to why most of you are here - these cookies! While I admit they are not your traditional "summer" fare, around here cookies are always welcome - and with gatherings beginning to open up again, we always have some sort of treat on hand. Keeping in the celebratory theme, I dipped into the (often forgotten) liquor cabinet to make these, based on a Courvoisier gingerbread recipe I had clipped out of the LCBO magazine at Christmastime and never got around to making it. Instead of the brandy, I opted for the opulent, spicy Goldschläger, which infused the cookies with a heady dose of cinnamon and helped the cookies crisp (as the alcohol evaporates faster than water). Mixing the dough brought back memories of both the holidays as well as my whole debacle building that castle three years ago (never again) - though if you wanted to build a structure with this dough you most certainly could.

The cookies smelled fantastic and were a breeze to whip up (hello, no waiting for butter to soften!) but looked a little plain and brown - not bad for an everyday tea or snack break, but not nearly enough for a celebration! So, while the cookies cooled, I set about making a simple icing with one important twist - another dose of Goldschläger. The alcohol served two purposes here - one, it allowed the icing to harden faster, given the evaporation of alcohol, and two, the little gold flakes in the liquid added an extra touch of sparkle to the icing. To gild  the lily, I topped the iced cookies with gold and silver sparkle sprinkles, though it's 100% optional. After the icing set, the cookies could be stacked and stored in an airtight container, although they lasted about three days here due to some hungry ghosts sneaking into the cookie jar!

Happy Canada Day, Happy (almost) 4th of July, and happy end to the first half of 2020. Fingers crossed that everyone stays safe, happy, and well this summer, and thanks again for the support all this time!

Sunday, April 12, 2020

Nana Cake

 N used to eat a variation of this cake every year for his birthday, when his nana made it for him. Today's revamp is a rich, whole grain spice cake topped with homemade blueberry pie filling and Chantilly cream. Different yet decadent!


In the midst of all this last-minute "re-learning" with online schooling - as both teacher and student - March and April have basically been non-starters for writing on this blog. If you are still tuned in, thank you for your patience! I have been cooking here and there (despite how difficult grocery shopping has become) and you can always find my latest yums on Instagram as well - I will get to the recipes on here one day!

Anyways, this cake is far more than it's relatively simplistic construction. N's birthday was back in December (see how far behind I am?) but when I asked him what kind of cake he wanted, he told me a story of the kind his grandmother used to make for him right up until she passed away. It was simple in essence - a baked box-mix cake topped with a can of pie filling and a tub of Cool Whip - but he adored it and confided that he wished he could have it again. When I asked if a homemade version would suffice (I hate box cake mix as a rule - not because of the ingredients but because of the sound our hand beaters make mixing it) he was excited and gave me free reign, as long as it wasn't chocolate. Perfect - I had a ton of odds and ends around the pantry and fridge after a month of sweet baking with Home Economics, so I quickly settled on a spice cake, and the ends of that fall's blueberries that I had frozen became the filling. 


Of course, I can't set out baking something and not tweak it! I knew I wanted to keep the flavour profile relatively rustic and traditional, so I went with a combo of oats and whole wheat flour in addition to the "white" stuff and used my own (homemade) pumpkin pie spice to add fresh and pronounced flavour. The pie filling was kissed with spices and orange and capped off with a tiny dose of orange flower water for just a little touch of flair. Both components also took advantage of the toasted sugar I had made up every few months after discovering the recipe and I'm glad I made that call - everything smelled cozy and warming. 

I toted all three components - cake, filling and whipped cream - separately to his place and assembled the "nana cake" there. Let me tell you - it didn't last very long, even with the rest of the seasonal sweets abounding!

Monday, March 16, 2020

Double-Glazed Caramel Cinnamon Rolls

When you need to celebrate but don't like cake, why not make these indulgent, brioche like cinnamon rolls the star? They stay soft for days thanks to a hefty dose of cream, butter and a hint of caramel in the dough, while a double glaze - first honey butter right out of the oven, then cream cheese frosting after they cool for an hour - adds even more decadence.


With all the insanity going on in the world today, it's hard to remember that there are still celebrations to be had! We are in the thick of birthday season (as I call it) here - between the beginning of March and the end of April there are no fewer than 6 birthdays in the family, mine included! In addition to the birthdays, lots of other little "yay days" are still going on, and now that I'm stuck at home for at least three weeks while the schools are closed I have become the de facto baker for them. 

One of my proudest achievements - besides my mom's requisite birthday cake - was this ginormous batch of fluffy, rich cinnamon rolls for my sister's work. One of the vet techs at her clinic, Kelly, was celebrating 20 years of service - a huge accomplishment for a field where burnout and turnover are sky high. However, Kelly is not a fan of cake in any form. I can't fault her for that, to each their own, and when they asked what she did like she said the one thing that spoke to my soul: cinnamon rolls.


Now, I have made cinnamon rolls several times before - from coffee laced to minis to my piece de resistance of laminated cream cheese and granola - but these I kept more or less basic in flavour with enough twists to the formula to keep them soft, moist and sweet for days. My first trick was using cream - not milk - to make the dough, which began the enrichment process, followed by a hefty dose of butter, eggs and the second secret - caramel sundae topping. The thick inverted sugars in the caramel prevented the dough drying out like it would with regular sugar and added a complex hint of flavour and colour that you won't get anywhere else. A splash of vanilla and pinch of nutmeg rounded out the sweet dough, making it perfect on its own. But since they are cinnamon rolls, they demanded a filling, and I kept that simple with butter, sugar and cinnamon.

Onto baking, which was no different than a smaller batch of rolls with the exception of a little more monitoring. The batch made 24, which could be done in two 9x13 pans, but I found a lovely foil roasting pan at the dollar store which fit them perfectly and kept transport easy! To compensate for the middle rolls getting less heat and possibly being underdone, I heated my smaller pizza stone on the rack before putting the raised rolls in, which blasted the middle of the foil pan with heat and ensured even baking. It would probably work without it, but better safe than sorry!


Finally, while the rolls were baking and smelling heavenly, I prepared the pre-glaze that would go on the hot buns right out of the oven. This was a little trick I picked up from either Serious Eats or The Kitchn (can't remember which, sorry) where they double frosted the buns. Not wanting the "gooiness" to be too hard to manage (these people work with furry creatures after all) I stuck to a simple vanilla, honey, butter and cream mixture which soaked into the bread and sealed in the rich, soft and fluffy nature of the rolls. After they cooled completely (on the counter overnight, which was torture but please don't refrigerate yet!) I heated up about 1 ½ cups of my cream cheese buttercream until just runny and spread it roughly over the rolls just to cover each. The leftover frosting was tinted and used for piping - purely optional, but if you're going to celebrate go whole hog!

Now, I know this recipe makes a lot of buns, but you can halve it to a more manageable 12 or even make the whole recipe, place in two pans and freeze after the first rise and shaping for up to 3 months. When you have a craving for sticky bun goodness, thaw the frozen pan overnight in the fridge, let rise on the counter for 45 minutes - 1 hour then bake and double glaze as usual. Problem solved!

Thursday, January 2, 2020

Orange Sauce for Roast Duck

Orange Sauce for Roast Duck is a decadent accompaniment to the fowl, and much less fussy than the traditional Duck a l'Orange. The secret? Duck fat as a finisher and extra orange zest!


The end of December was the season of duck! It's been a relatively novel culinary experience for me - cooking it at least (N got to eat it!). I had never tried duck until I moved to Ottawa for university, but that was a restaurant. I only had the chance to cook the poultry this summer, when N picked up a plump breast from White House Meats and I gave it the cast iron skillet treatment. Apparently I didn't do a half-bad job, because for his birthday I was specifically asked to make a whole (slow) roasted bird, and then for kicks I picked up another breast as his second celebration meal!

Of course, while duck itself doesn't really need an accompaniment, there is the little matter of a traditional dish called Duck a l'Orange - my mom introduced me to it's concept when I was young, and commented that it, along with Crepes Suzette, were some of her favourites. Inspired, but not willing to over-complicate an already tricky (to me) roast process, I made an orange sauce to drizzle over the meat after it was cooked to perfection. I had leftover duck fat (from the breast) sitting in my freezer, so instead of the butter in the original recipe, I whisked that in. For extra flavour, I used raw sugar and raspberry wine vinegar which played off the fresh orange juice beautifully. All that was required was a touch of salt and pepper at the end - although rosemary or thyme would also be a perfect addition at serving time!

If you love sweet and savoury along with your meats, this sauce is right up your alley! It would work with other types of orange too - blood orange would really pop colour wise and add an exotic flavour, while clementines puree into a sweet juice and the peels are thin and mince-able with no need for a zester.

Tuesday, December 24, 2019

Biscotti di Vino Rosso Speziati

Biscotti di Vino Rosso Speziati are dainty cookies filled with the flavours of mulled wine with an added crunch from black sesame seeds. Perfect for accompanying fortified wine after a meal or on a cheese board for a unique, lightly sweetened treat this holiday!


Ever been trying to multitask and got so cocky with your "skills" that you totally mess things up? Yeah - that was almost me when it came to photographing these cookies. Thankfully my reliable taste-tester had asked for a second one so I snagged a photo before it too disappeared!

I cannot believe I made a huge (read: double) batch of these "grown up", two bite cookies and almost forgot to photograph them! This is the perils of trying to do everything at once during peak term-paper, report card and traveling season, but I can assure you that they are well worth making yourself if you enjoy the scent and flavour of mulled wine! I opted for black sesame seeds and white sanding sugar for my coating to give the cookies a bit of sparkle and nutty crunch, and would recommend not skipping the freezing step under any circumstances, as these cookies are relatively delicate and this helps hold them together. The Italian guests we had over last week enjoyed these dipped into dessert wine after dinner as they aren't too sweet, and I bet they'd be perfect on a cheese platter too.

I will be back posting after Christmas, so have a great holiday and thanks for another great year!

Biscotti di Vino Rosso Speziati
Adapted from Domenica Cooks 
Makes ~24
2/3 cup extra-virgin olive oil
3/4 cup sugar
1 1/2 tbsp cinnamon
1/2 tsp ground ginger
1/4 tsp ground white pepper
1/4 tsp ground nutmeg
1/4 tsp ground cloves
Pinch of fine sea salt
2 tsp vanilla extract
zest of 1/2 orange
3/4 cup dry red wine (I used a Merlot)
1 1/2 cups "00" semolina flour (I used one labeled "for pasta")
1  cup all purpose flour
1/2 cups spelt flour
1 tbsp baking powder
1/2 tsp baking soda
black sesame seeds, to top
  1. In a bowl, whisk together the oil, sugar, spices, salt, vanilla, orange zest and wine until well blended.
  2. Add the flours, baking powder and baking soda, mixing until well blended.
  3. Cover and let sit 30 minutes.
  4. Use a tablespoon measure or scoop to form the dough into balls, and roll them in the black sesame seeds to coat.
  5. Place the cookies 1 inch apart on a parchment-lined baking sheet and freeze 1 hour. 
  6. Heat the oven to 350F.
  7. Bake for about 22 minutes, until set but not dry. 
  8. Transfer the cookies to wire racks to cool completely. Store in an airtight container up to 1 month.

Thursday, July 11, 2019

Nut-Free Baklava

Yes, nut free baklava is possible! The filling for this decadent flaky pastry is a mix of nut free granola, sunflower seeds and buckwheat kernels pulsed with raw honey and spices, while the syrup is honey and sugar with a splash of rose and orange flower water. Rolled, rather than stacked phyllo ensures the filling stays put and slicing is easier too!


Baklava is a definite crowd pleaser - I honestly don't know a single person who truly abhors the sweet, sticky, flaky pastry once they've tried it! Since my grade 7/8 class at work was putting on Mamma Mia! as their school play, they asked if I could make the dessert option for their refreshment table. Of course, I agreed, and the subject of baklava came up. However, there was a big, glaring "BUT" in this plan. As per school policy, there could be no nuts involved.

Not to toot my own horn (okay, kinda to toot my own horn), this challenge didn't faze me at all. While the previous Home Economics teacher had mentioned that there was "no way" the dessert could be made without nuts, I have had previous experience in doing just that. I took the same principles and adapted them to a more traditional baklava application (involving the syrup component). To save on mess and make for a somewhat neater presentation, I rolled the sheets of filled phyllo instead of stacking them, which both ensured an even distribution of filling and an easier cutting job. The rolls also absorbed the syrup a little more thoroughly, creating bites of pastry that were sweet without being wet-wipe sticky.

Now, I will not say this is a "quick" dessert. I made it the morning before it needed to go into the school so it had a full 24 hours to absorb the syrup, but all told it took about 1 1/2 hours to put together from start to finish. Do make the syrup first - it needs to cool to room temperature and this way it stays out of the way! Any leftover filling and phyllo can be made into "muffin tin" baklava snails (my mom loved those as her "treat" and they also gave my fiance a chance to taste the dessert for the first time), and the filling can also be frozen and used as a mix-in for bread or cake filling. Make no mistake, the next time I get a chance, this is going to be back on the dessert table.

Monday, April 8, 2019

Gluten Free, Sugar Free Vanilla Bean Angel Food Cake


Made my first birthday cake in 10 years - a Gluten Free, Sugar Free Vanilla Bean Angel Food Cake. Sweetened with a blend of monkfruit and stevia, its still light, fluffy and sweet. Perfect for topping with fresh fruit!


Happy birthday to me! I typically have a blase attitude about my birthdays for a few reasons. Like most people, I'm usually working on the day itself, and if I'm not is often because it's Easter - a fact that my dad and sister also have to deal with (we're all super close date wise). Combined with the fact that birthday cake's heavy reliance on the two elements I don't digest well - fat and gluten - birthday cakes are also not really something I had to look forward to. However, that all changed this year, when I not only found a fat free and gluten free recipe that tasted fantastic, but a sugar free one too!

I am a huge believer in taste coming to the forefront, and thankfully my history with baking gluten free served me well in preventing a cake that tasted like the stereotypical gluten free cardboard - especially in the absence of a ton of fat. For me, the secret lay in layers of vanilla - vanilla bean, vanilla extract and vanilla flavoured stevia, which made each bite perfumed with the flavour but not in an overwhelming or "fake" way. In fact, I was pleasantly surprised to note that this angel food cake baked - and stayed - moister than "regular" angel food cake, even days later (it lasted a grand total of 4 days here before being demolished).

That said, the batter is somewhat thicker than your standard angel food recipe, and the top of the pan will be somewhat bumpy... but since that becomes the bottom, nobody will see! Also, being sugar free, the cake will not brown very much, maintaining an angel white appearance. Again, appearance was trumped by taste here, especially when I drowned mine in melted cherry jam (my favourite). FH used homemade strawberry sauce and whipped cream to decorate his and proclaimed it a success, not even realizing it was gluten or sugar free. The dozen egg yolks left over? They became a decadent pair of braided loaves, which will appear on this blog soon!


The best part of all this was that now, I have a cake option to enjoy and share with others no matter what the occasion - I've been asked to make it for Easter this year, and it is a top contender for my wedding cake a few years down the road too!

Friday, February 1, 2019

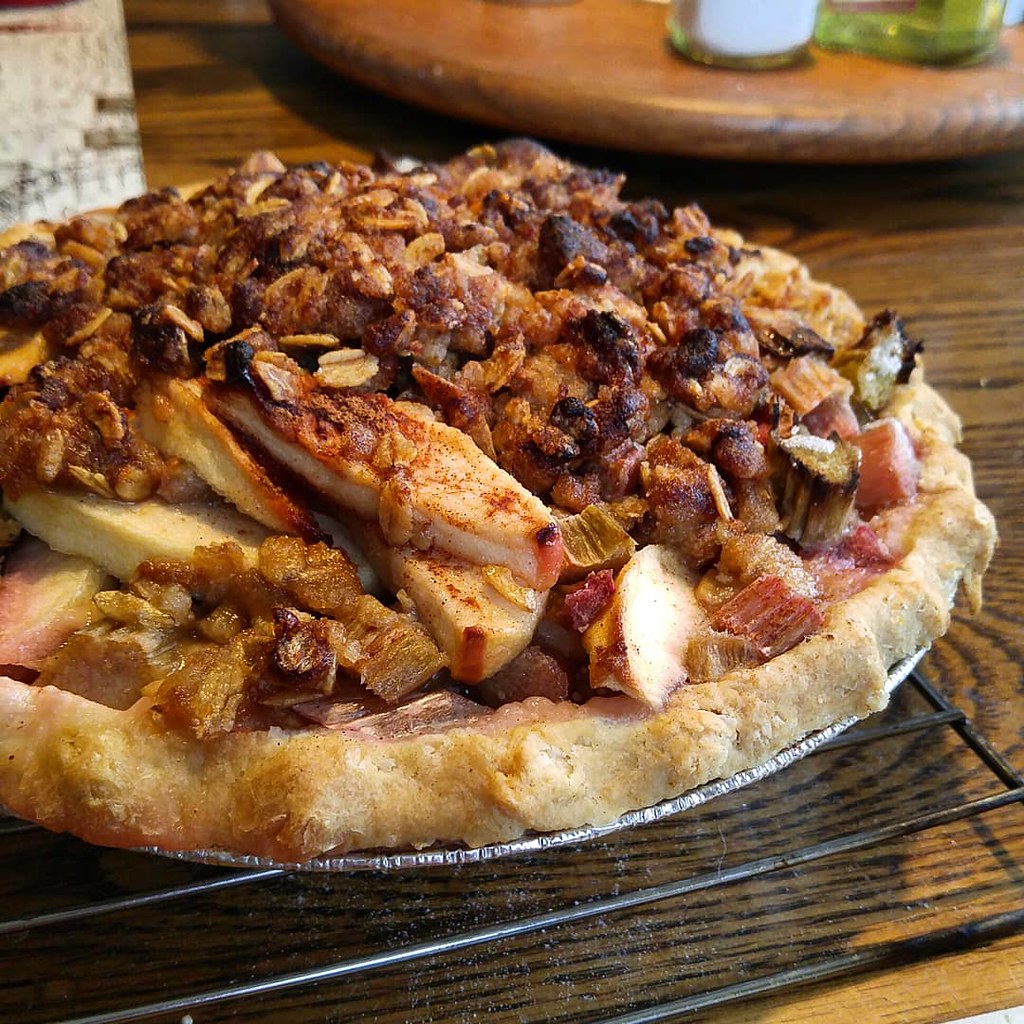
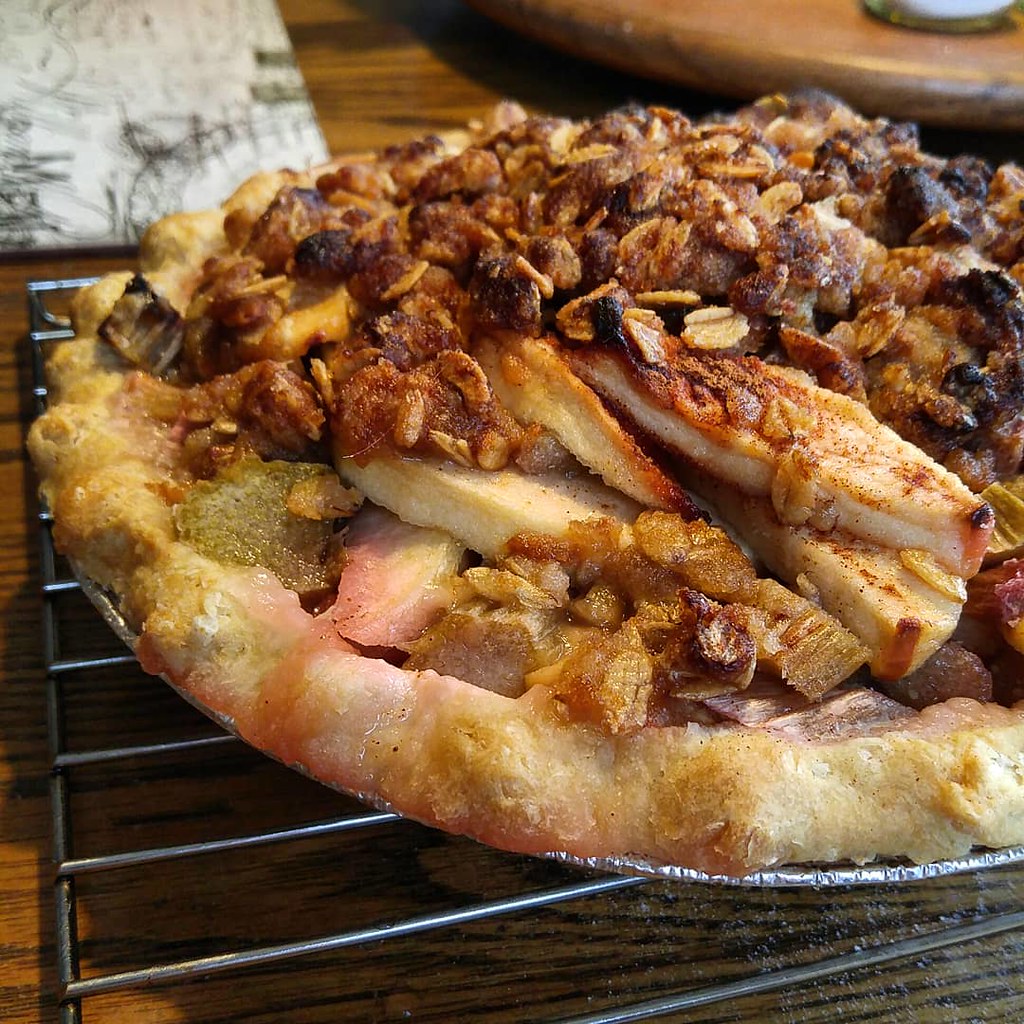
Apple Rhubarb Crumble Pie

Apple Rhubarb Crumble Pie is sweet, tart and the perfect way to use up your garden's bounty.

Apple Rhubarb Crumble Pie

I don't know about you, but my freezer is always full of frozen produce. We have the standard peas and cauliflower, but I also have hoards of cherries, peaches, mixed berries and rhubarb at my disposal should jam, pies or crisps need to be made. Of course, having a rhubarb plant in the backyard means I have to get creative and use up the rhubarb that's there before the next season starts! Without any (decently priced) strawberries, the standard jam or pie was out of the question. However, I came across a new rhubarb pie that is perfect for the cooler weather and super simple to make!

While this pie is already easy (hello, no top crust!) you can make it even easier with a press-in pie crust or even a storebought shell... I won't tell, promise! There are two keys to making this recipe sing - the honey / sugar syrup bath surrounding the rhubarb and apples, and the lightly spiced streusel with added apple flavour with the addition of apple juice. One caveat - you need to tent this one with foil. There is so much starch and sugar that the crumble will burn, and that's no fun! Letting the whole pie cool (as hard as it is) also lets all the pectins and starches do their work to set the filling, meaning beautiful slices. Whether you have a special occasion coming up (yes, even Valentines, or anti-Valentines Day!) or just want a delicious dessert for a weekend dinner, you can't go wrong with this.

Plus, in the Spring when rhubarb begins to grow again, this pie works just as well! Just toss the rhubarb with the sugar and let stand for an hour before proceeding.

Apple Rhubarb Crumble Pie

Tuesday, January 8, 2019

Sweetened Condensed Coconut Milk

Condensed Coconut Milk is thick, sweet and perfect for anything you might need a hit of sweetness for. Its gluten free and vegan too, with a delicate floral flavour. 

Condensed Coconut Milk

One of the things my mom loves more than anything else is key lime pie. If she had a choice for anything on her birthday, Mother's Day, any day... she would pick it hands down, particularly if it came attached to a trip to Florida. While it took me a while to become accustomed to the flavour, I have to admit I enjoy a good slice of the confection too, and I will occasionally make it (or a version of it, seeing as key limes are rare here).


One of the main ingredients in key lime pie is condensed milk - thick, gooey and quite possibly the best substance outside of peanut butter and Nutella. Unfortunately for so many people, condensed milk is simply not an option due to dairy allergies or other dietary restrictions. Now, non-dairy sweetened condensed products do exist - including soy and coconut varieties like this one - but they are pricey and can contain additives and thickeners. My homemade version takes time, no question, but it's simple and the taste is amazing. I've used this condensed milk to make fudge, and Meyer lemon pie (similar to key lime) and it definitely holds its own texture wise. The taste is unmistakably coconutty, but not really overwhelming according to those who tasted it (I would but I'm allergic!).
 
Whether you need it because you're dairy free, or you're just looking for an extra layer of flavour, I highly recommend giving this a try. Who knows, maybe your key lime pie will be next level this Summer! Oh Summer, where art thou?

Thursday, September 27, 2018

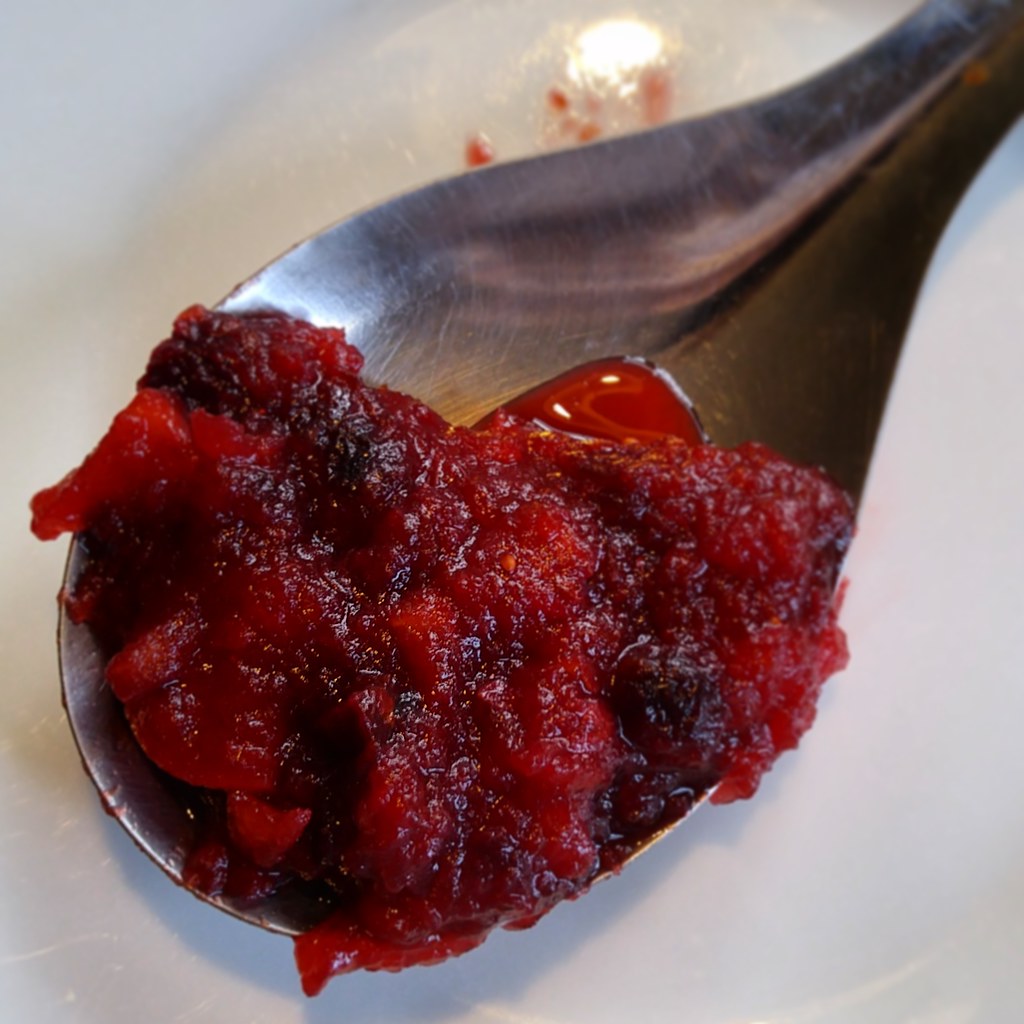
Beetroot Cranberry Conserve

Beetroot Cranberry Conserve is tangy, sweet and slightly earthy, not to mention a brilliant colour! A nice Chianti makes it a little savoury, perfect for the holidays.


Beetroot & Cranberry Conserve

It's almost Thanksgiving weekend here in Canada - where the heck did September go? While my mom is stocking up on turkey, stale bread, potatoes and lots of butter, I took on the task of making one of the cult favourite condiments on every holiday table - cranberry sauce.

What emerged from my kitchen last year - and soon to be this year as well - is a delicious sweet-tangy conserve with a hint of savoury flavour, but I do hesitate to really call it a cranberry sauce. For one, the only cranberries in this recipe are dried (although they were unsweetened) - the brilliant ruby colour is the result of heirloom beets from my garden and a glug or two of red wine. For added body and cohesion, I used apples (of which we always have a ton of this time of year). Of course, many of the standard "holiday" seasonings found their way into the pot, including the zest and juice of a blood orange. Taste tests along the way were quite rewarding, and leftovers that didn't fit in either the canning jars or the sauce bowl were eaten by house guests on crackers with cheese.

Speaking of canning, I highly recommend making at least this one batch, if not two, and preserving half for Christmas season. That way, you have a side dish done and you don't need to take up another stove burner in the middle of holiday feast-making!

Beetroot Cranberry Conserve
Makes 32 fl oz, 32 (2 tbsp) servings
3 apples, peeled and diced
1 lb (about 5 small) beets, peeled and diced
¾ cup dried cranberries (preferably unsweetened)
¾ cup sugar
¾ cup red wine (or cranberry juice for non-alcoholic)
Zest and juice of 1 large orange (I used a blood orange)
¼ tsp nutmeg
Pinch cloves
Pinch sea salt
  1. Combine all the ingredients in a deep, heavy saucepan over medium heat.
  2. Bring to a boil, then reduce heat and simmer until thick and mounds on a spoon, about 1 hour.
  3. Can 15 mins in a waterbath or freeze leftovers within 1 week.
Amount Per Serving
Calories: 50.4
Total Fat: 0.1 g
Cholesterol: 0.0 mg
Sodium: 11.3 mg
Total Carbs: 12.0 g
Dietary Fiber: 1.2 g
Protein: 0.3 g

Sunday, September 16, 2018

Egyptian Fruit Tartlets

These Egyptian Fruit Tartlets are a variation on my favourite fig newton recipe, and are perfectly sized for a two bite treat!


Egyptian Fruit Tartlets

Well, I'm more or less back to everything after this busy, busy Summer! Apologies to those of you who enjoy my writing but I needed to take the break to deal with both school and personal commitments. At any rate, I will do my best to at least get one post a week out, and what better way to start than with these delicious tartlets?

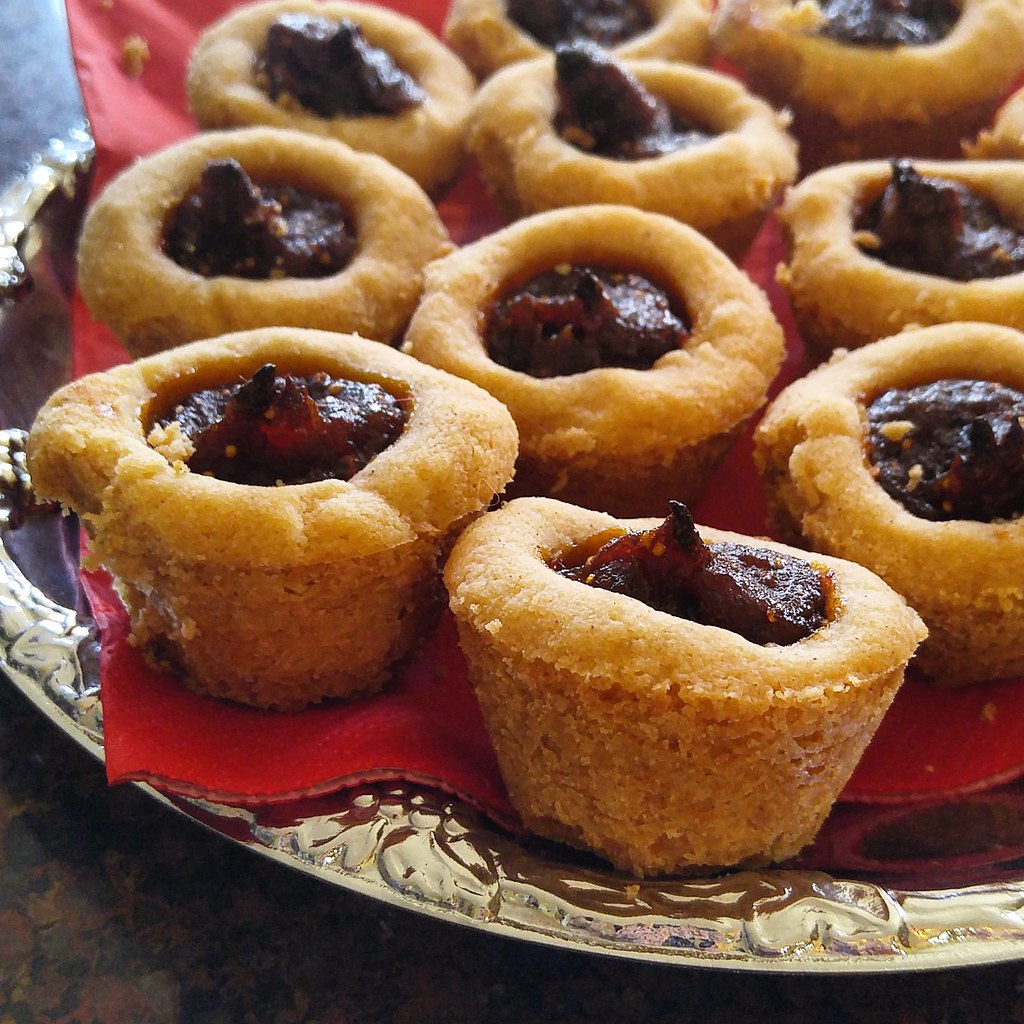
These tartlets are different from the standard pastry shell variety in a couple of ways. First, the casing is more of a shortbread style of dough, relatively soft and pliable. Second, the fruit is in a paste form, rather than fresh or "pie filling" format. The filling has to be my favourite part of the whole treat, since it is almost identical to the filling I use for date squares. My inspiration for these tarts came from the Middle Eastern pastry maamoul, and since I needed to make a dessert for one of the school plays that kept to the Arabian / Egyptian / etc theme it seemed to fit the bill nicely. To keep the filling from being super sweet, and since a few of the kids hate dates (I can't believe it, they are nature's candy!), I added some dried figs which lent a delicate texture and floral note. Those of you who have been following me know I love figs, and especially fig newtons, so I could definitely polish the spread off with a spoon.


I mentioned it earlier but the dough is very soft, even after chilling. I didn't want to add too much flour at the onset and had nothing but a paste on my hands, but I gradually added flour until I got a shortbread dough texture. for me, 27 oz worked well, plus the flour I dusted with when rolling. You may also need to tamp down the middle of the shells after baking to keep the depression intact. It's all worth it - I promise! While the recipe makes a fair amount of tartlets, it does scale well, and you can freeze leftovers as well without issue.

Saturday, May 5, 2018

Vegan Churros

These crisp-chewy churros are baked - not fried - and coated head to toe in cinnamon sugar. Even better? They're vegan and nut free!


Happy Cinco de Mayo! While I've never been to Mexico (it's on the bucket list) I do appreciate "real" Mexican food when I can get it. The one exception that I will always make is guacamole - don't hate me, but I can't stand avocado in any form (except perhaps as a cookie or brownie). Mole, arroz negro, cajeta or fideos though- those are fair game, especially when paired with the gorgeous fresh fruit that is so abundant there. One of my all time favourite treats is the churro, and growing up there was a Mexican bakery near the mall that made them in a few different styles. The "basic" sticks, simply coated in cinnamon-sugar, were perfect for on-the-go munching and were never greasy or prone to weighing you down. For more immediate enjoyment, they served the sticks filled with either jam, dulce de leche or Nutella - if that isn't Heaven on a plate, I don't know what is. They had dipping sticks too for the rich, thick hot chocolate, all alongside some of the best, freshest tasting smoothies I ever had. 

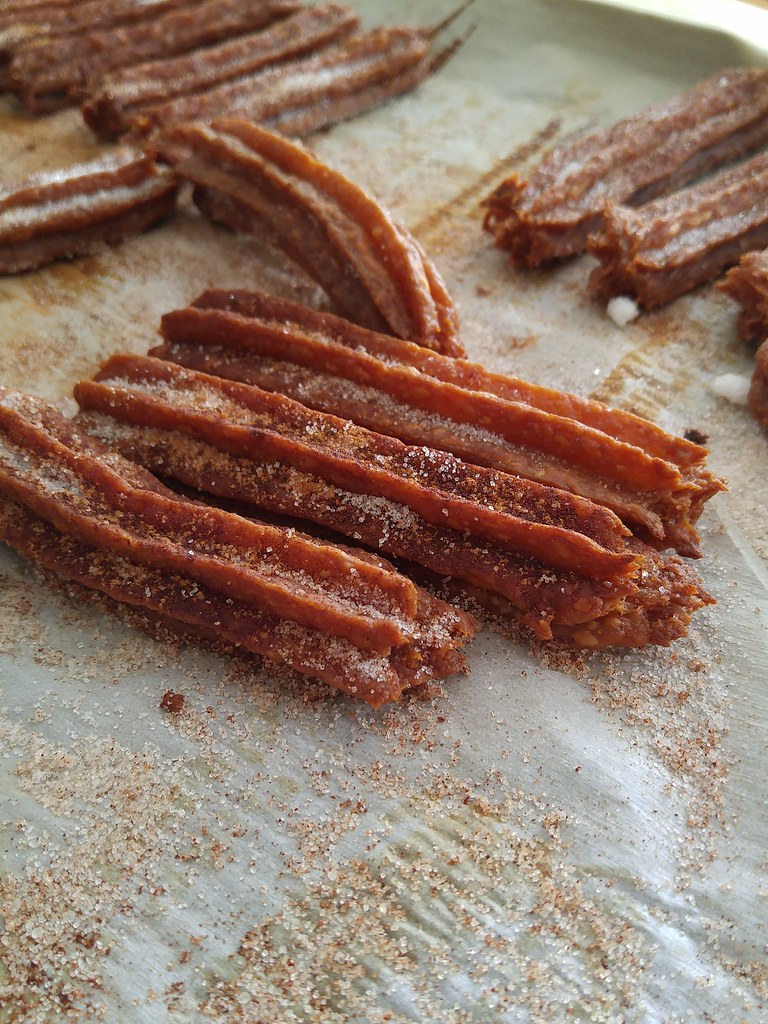
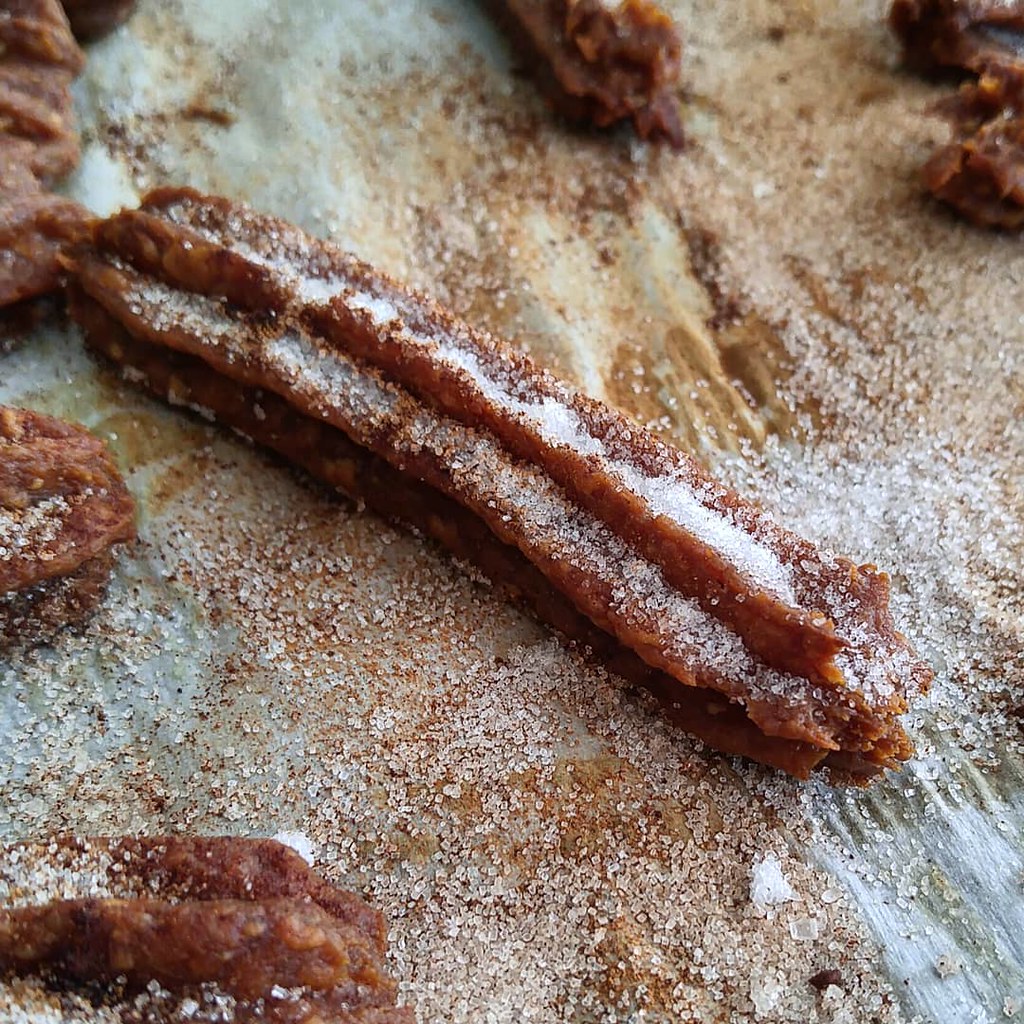
Fast forward 20 years and I'm now making them with my Home Ec classes. Churros are, in their very essence, an extruded sweet-ish choux paste, and while they are usually fried to delicious golden perfection, I have a deep-seated fear of deep frying and opted to try a baked version. One of the cardinal rules about choux dough is that it is so temperamental in poor weather, and our egg-and-dairy originals fell flat and doughy by the time I got them into the oven. Not having any extra eggs on hand, I quickly scoured the 'Net for a way to approximate the recipe without the key ingredient (ludicrous, I know, but it was 8PM and I didn't feel like going to the store). Finally, armed with a few well-reviewed recipes, I concocted a slightly modified version of Nature's Emporium's. I didn't need to keep things gluten free, so regular flour fit the bill just fine, and I added a touch of nutmeg for that doughnutty flavour.

Vegan Churros

Out of the oven and rolled in that classic cinnamon sugar, these tasted amazing, and the dough smelled a heck of a lot better than the standard choux paste I'm used to (I can't stand the smell of eggs). These held up to storage a bit better than their pastry cousins as well, keeping crisp for at least a day. I would suggest, should storage be your aim, refrigerating or freezing these "naked", then reheating and sugar-coating them as needed. Of course, a caramel or chocolate dunk is purely optional, although delicious!

Thursday, May 3, 2018

Cream Cheese Buttercream Frosting

This is hands-down my favourite vanilla frosting recipe - it is decadently butter-rich, not too sweet and is stable enough to stand out at a party for a few hours without melting. My picky sister gave it her seal of approval too!

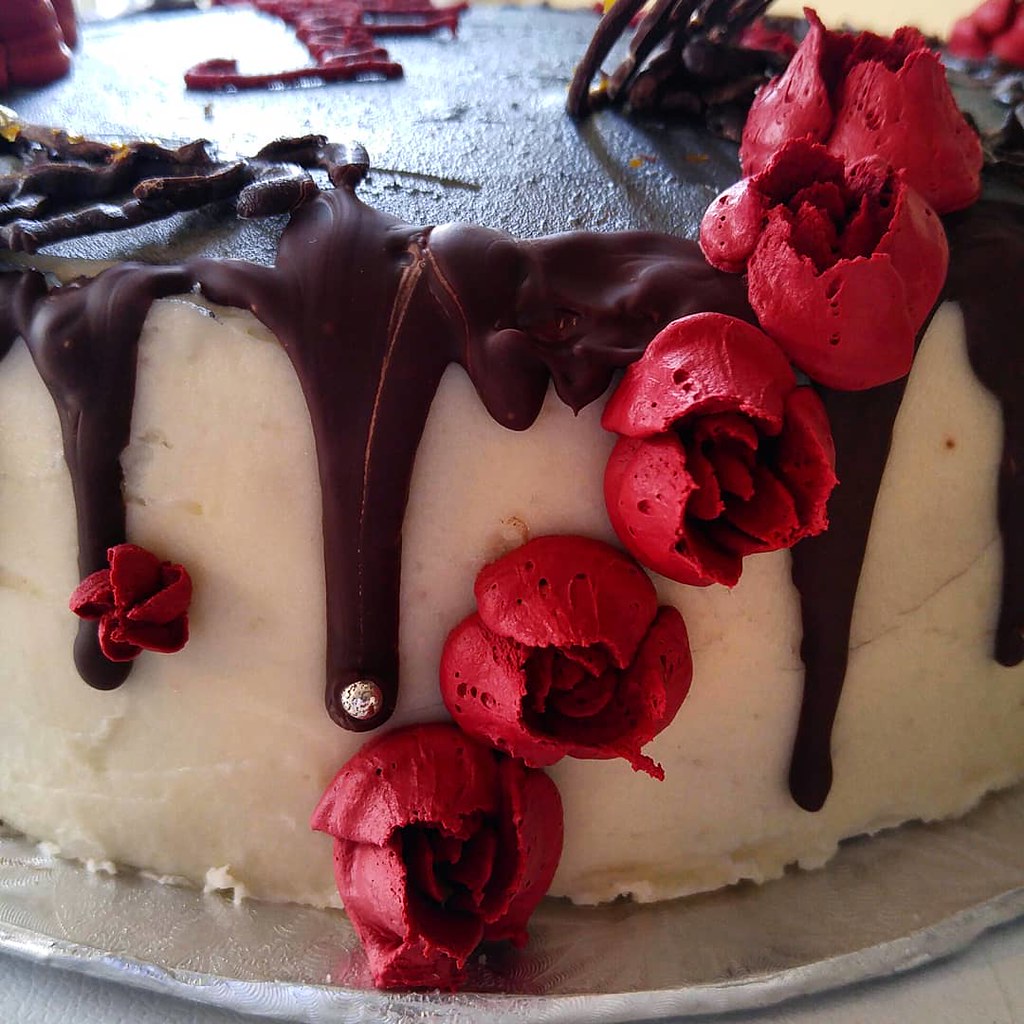
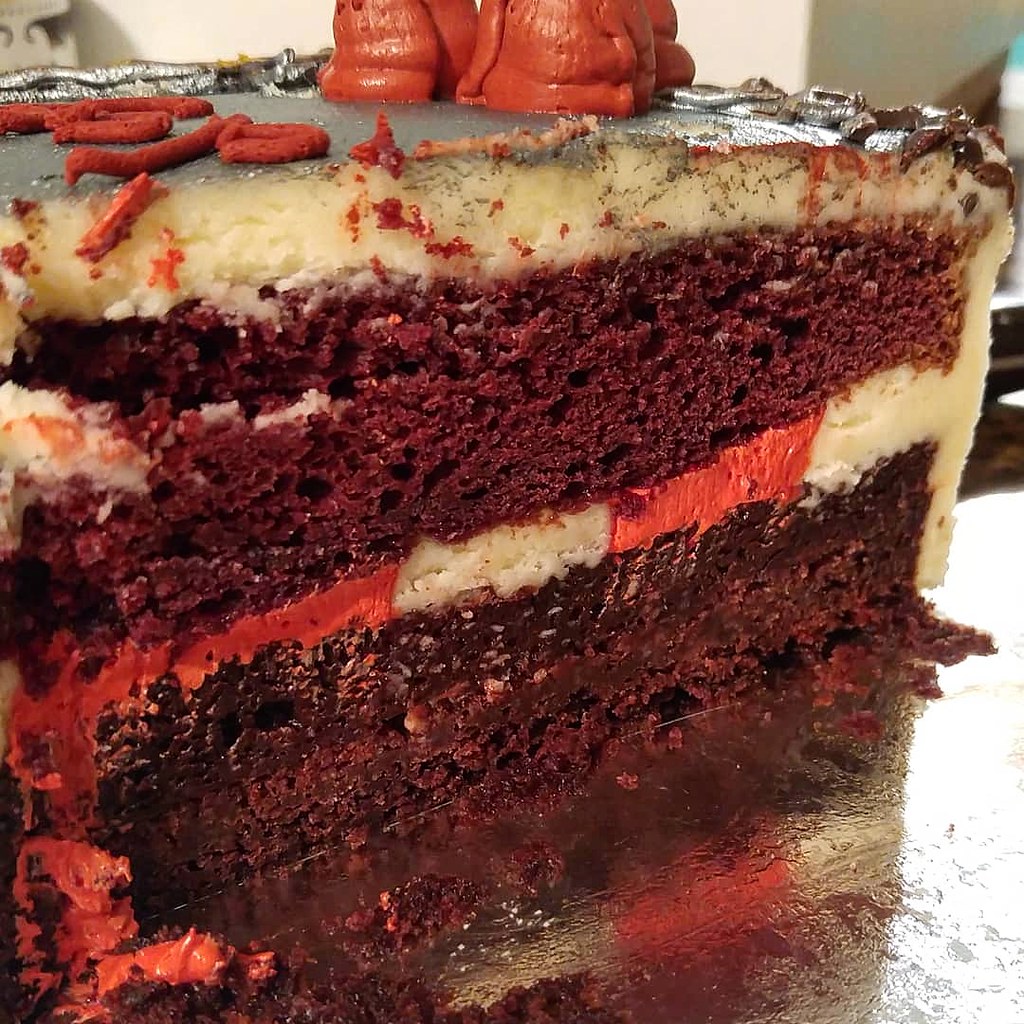
Red Velvet Birthday Cake

While I'm no professional, making cakes is something I really enjoy doing. The cake recipe itself is probably the most nervewracking part of the experience, since without a well-done (and tasty) base, no amount of frosting or chocolate in the world is making that dessert a hit. Case in point: this year my mom asked for red velvet cake, one of her (and my) favourites. I had a few recipes in my arsenal, but I wasn't 100% happy with them, especially since I knew they'd have to stand up to a fairly hefty frosting a long decorating process. I turned instead to a recipe I had bookmarked for a while - Alton Brown's, which stated it made 3 layers (precisely what I needed). Imagine my surprise when the batter barely made one layer, was definitely not the red shown on the TV or online, and while it was tasty in its own right, it was not red velvet. I couldn't bear to throw it out, so that dense, super-moist layer became the bottom of my stack while a half-batch of the Waldorf Astoria recipe perched on top. 

Red Velvet Birthday Cake

Since the cake was not going to be my crowning achievement this year, I set about making a killer frosting. I knew I wanted to make a cream cheese style frosting (cream cheese frosting is my favourite) but I also knew it couldn't be one that screamed cream cheese, since the crowd is a divided group on the subject. The one person I didn't even try to impress was my sister - she is traditionally a canned chocolate frosting-or-die girl, and has the palate of a well trained connoisseur when it comes to tasting "anomalies" in her food. 

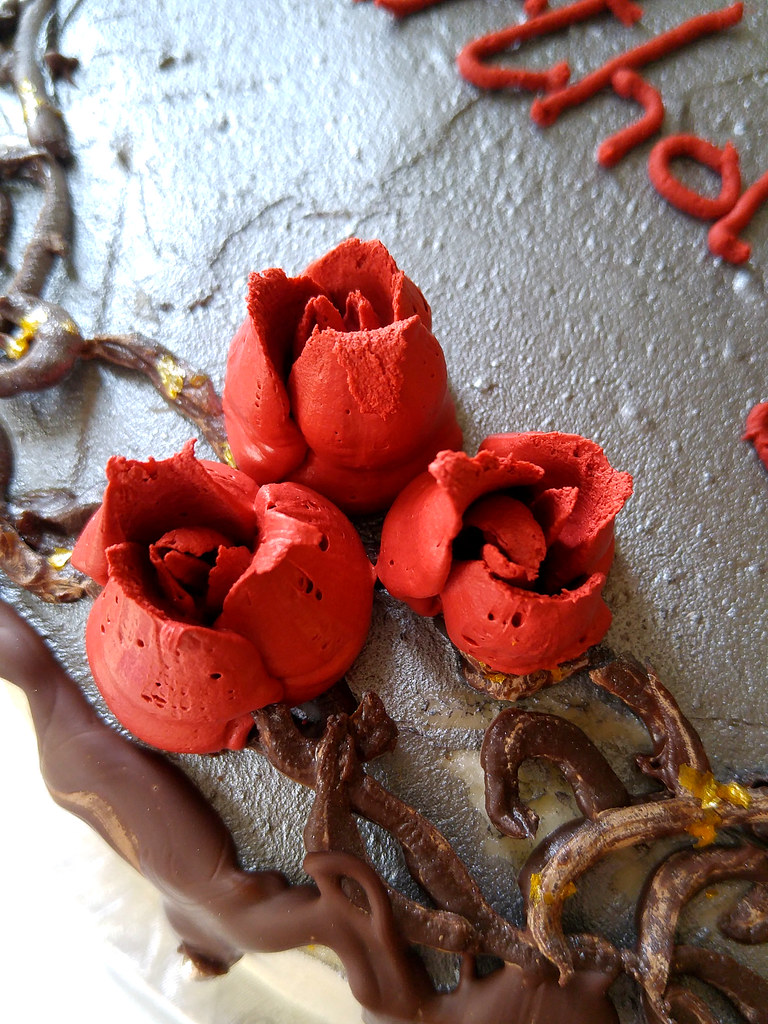
With my parameters set, I started modifying my go-to cream cheese frosting, adding more (and better quality) butter and less cream cheese until I had something undeniably rich and decadent with enough tang to offset the sweetness of the cake without giving away the cream cheese. It spread beautifully at room temperature and set well in the fridge without becoming rock hard, and even avoided the super-saccharine flavour of most decorating frostings when I stiffened it with extra icing sugar. I tinted it dark red for the lettering and Russian tip flowers and the colour stayed true. The flavour was incomparable though - to the extent that my sister complimented it, and asked for me to make it again for her birthday cake! If that's not prime testimony, I don't know what is.

As for the rest of the decorations, I guess you can say I was in a "Beauty and the Beast" frame of mind (one of our classes is doing the play this year and I'm immersed in the song and dance a lot). I decided on a "mirror" theme with silver spray for the "glass" and dark chocolate filigree with gold flecks for the "frame". The final touch was a chocolate line-work rose. Delicate, delicious, and chocolate... all the chocolate!

Red Velvet Birthday Cake

Do you make birthday cakes at home? What's your favourite recipe?

Wednesday, April 11, 2018

Chocolate Scotch Eggs

These Scotch eggs are gluten free, nut free and super chocolatey! Who says Easter is over? No Creme Eggs? The brownies are divine on their own!

Chocolate Scotch Eggs

Ever since one of my co-workers made "real" Scotch eggs for a lesson on the layers of the earth (practical geology!), I've been fascinated with the sweet version. The combination of Creme Eggs and brownies has always been more palatable to me than the traditional deep fried hard boiled egg / sausage concoction - I am not a fan of eggs in general, and hard boiled eggs and I have never gotten along well. Creme Eggs, though, were my kryptonite every Easter as a kid - I would find exactly 3 "regular size" eggs hidden amongst all the other "standard" milk chocolate eggs and knew I had to make them last. This was an issue because back then, Creme Eggs really were only around until Easter, when they disappeared for another 11 months. It was definitely a bittersweet experience, especially since Easter usually coincided with either my sister's, my dad's or my birthday, meaning that we got less candy from the Easter bunny because "he knew we'd get lots of chocolate from home".

Eventually, not only was the Creme Egg "season" extended beyond a month, but Cadbury started coming out with miniature versions of their super-sweet classic. The great thing with the mini eggs was that you didn't get a massive sugar rush after having one or two, but they still killed that craving. Even better was their texture when frozen - the fondant melted slowly and completely rather than getting caught in the back of your throat, and it took longer to eat them so they lasted longer. When I found a bag of the British version (sorry, they're better) in with the "last chance before Easter" bin at the store, I snapped them up with the sole purpose of turning them into Scotch eggs. 

Some of the recipes I had found online called for full-size Creme Eggs to be covered in the brownie "cake pop" dough, but that just seemed extremely excessive - I, a bona-fide Creme Egg (and brownie) lover, would never be able to finish one, so I was not about to expect others to! The mini eggs, once covered in the brownies and graham crumbs, fit perfectly in an egg carton and were a perfect dessert size. As I was making them for a gluten free friend of mine, I was thrilled to find that the UK Mini Creme Eggs are GF (sorry, domestic CE, you need to step up your game). I whipped up a batch of basic, cocoa-based GF brownies and got to work. They looked fairly close to "real" Scotch eggs (smelled a lot better though) and the brownies that didn't become coating were enjoyed by two of my other pals. Even though Easter was over, and it was my birthday party, I couldn't think of a better way to celebrate!

Do you bake or cook for others on your birthday?

Saturday, December 30, 2017

Allergy-Friendly Shortbreads

Why is this shortbread cookie smiling? He's both gluten free and vegan, and tastes divine!

Allergy-Free Shortbread

While I'm glad to see 2018 arrive, the end of December is always a bittersweet time for my sister and I. Every year, my mom donates exactly one month to shortbread cookie baking, and once January 1 rolls around we pack up the cookie cutters and sprinkles for another year. While we gripe and complain about the dearth of melt-in-your-mouth, buttery goodies the rest of the year, I can appreciate that the adage "absence makes the heart grow fonder" really holds true in this case.

Alas, not everyone on my gift list is able to appreciate such decadent cookies. I speak of course of my friends with Celiac and food allergies - namely dairy, nut, soy and egg. The original cookie contains a short list of ingredients - flour, butter, icing sugar, egg yolk and vanilla - so finding workarounds that didn't compromise the pure flavour of the originals was tricky. Most margarine contains either dairy or soy (or both), and while I do have a recipe for a vegan "egg yolk" substitute I needed something quick and easy. I eventually settled on my Homemade Egg Replacer powder, which worked well and kept the cookies' tender qualities due to it's starch component. For the "butter", I went with a new-to-me vegan spread that was also soy-free: MELT. Usually I would stay far, far away from "spreads" in cookies like this, but the result was far better than I supposed and the cookies didn't have any lingering taste of coconut (the main ingredient). 

The great thing about this dough is that it freezes well too, so I made a full batch and divided it into thirds (one for each recipient). I got about 10 cookies per mini-batch, which I either decorated with chocolate or painted with food colouring.

Do you have a special holiday-only cookie? Let me know in the comments!

Wednesday, November 22, 2017

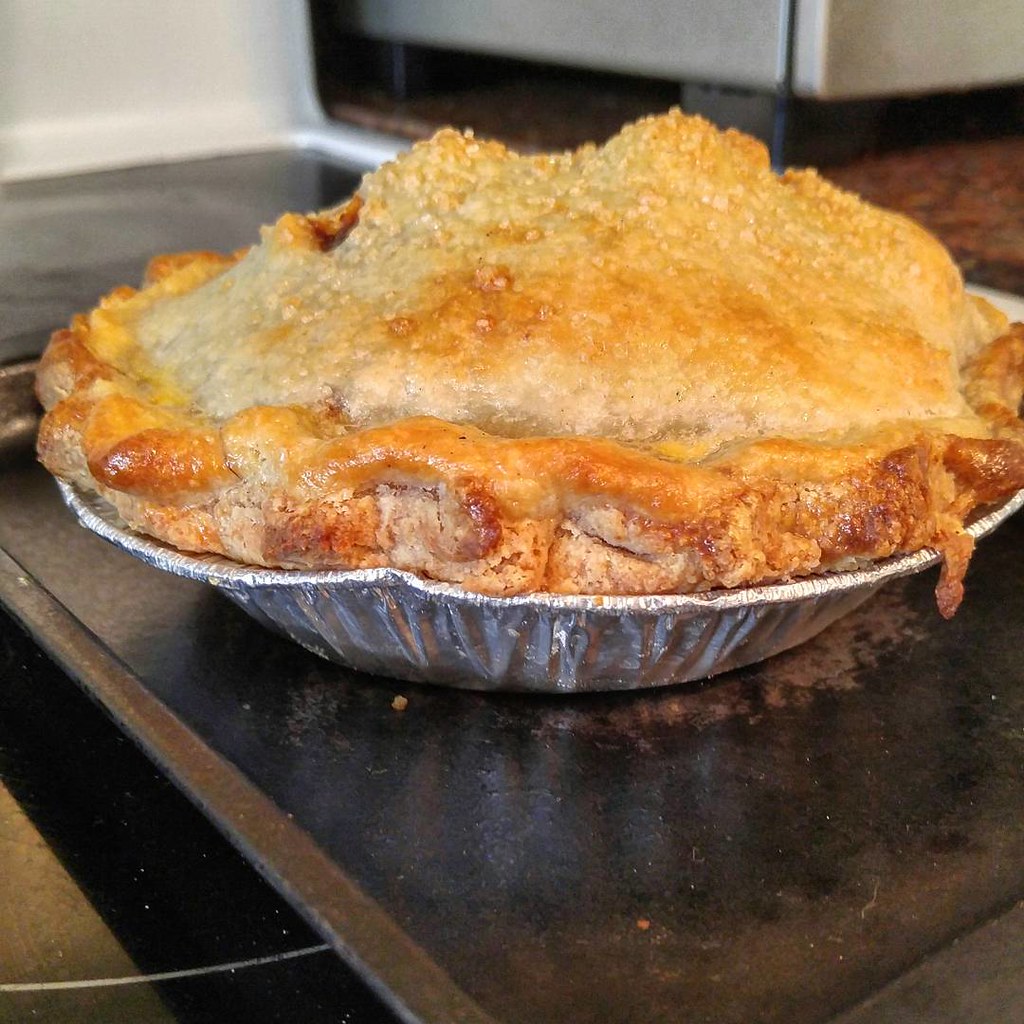
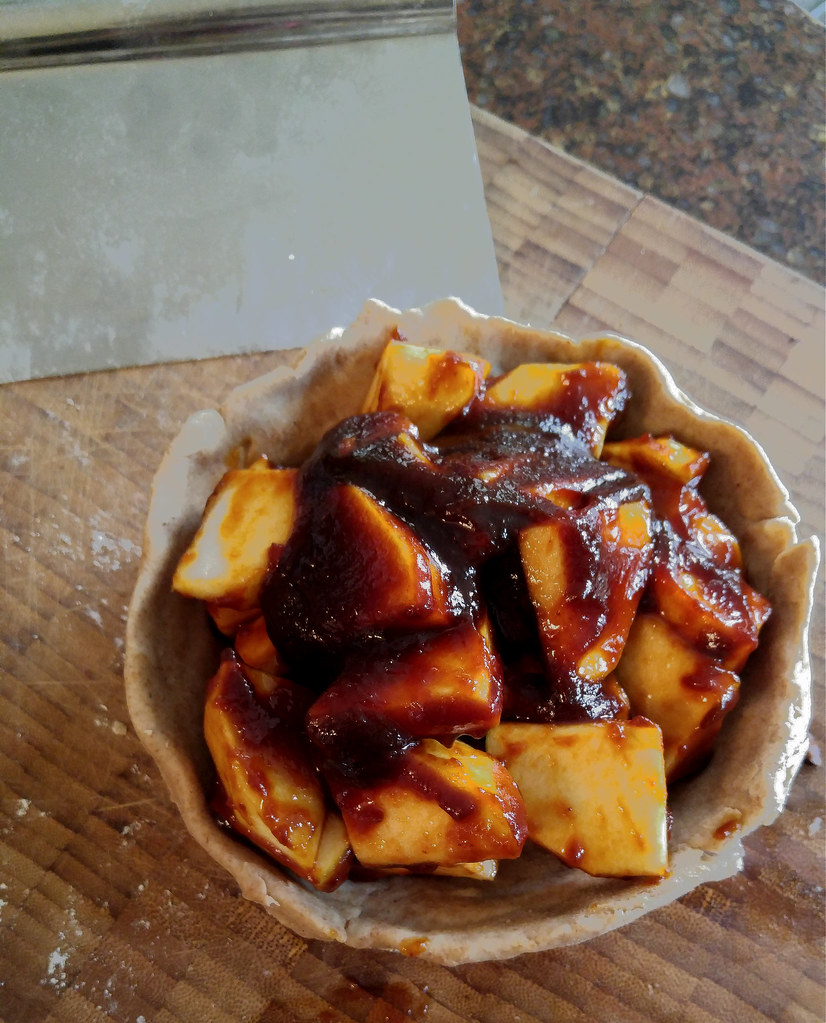
Flaky Suet Pastry (and Apple Butter Apple Pie)

Suet sounds awful and archaic, but it makes super-flaky, melt in your mouth pastry perfect for any type of pie!

Apple Butter Apple Pie

As someone who doesn't eat meat (except seafood and fish), it's surprising to most people (including myself) that I'm no stranger to cooking with animal fat. I take great pride in rendering my own tallow and schmaltz from mostly local animals after the meat is used for dinner. The fat makes some amazing savoury dishes to be sure, but also lends that "old fashioned" flavour to the sweet kitchen. I don't normally go out of my way to purchase these fats pre-rendered, but when I was given a bag of suet from someone who didn't realize it was animal fat (I know...) I started searching up ways to use it. I found a lot of traditional Christmas puddings - which nobody here likes - but I started thinking pastry. After all, suet is essentially the beef form of lard - and the shredded, frozen kind I had in my possession was also covered in flour so the pieces remained distinct. Distinct fat particles = flaky pastry. Lightbulb flash.

Having used lard before in pie crusts (and loving the tender, flaky result), it wasn't a far leap to make. However, I didn't have any recipes using suet per se, and certainly none using it in this fine, flour-coated format. Thankfully, the UK and Australia seem to utilize this ingredient more than we do in Canada, and I finally found a recipe that promised a puffy, flaky and tender crust. Originally, the recipe was intended for savoury pot pies, and I can see why, as the dough is somewhat more elastic than straight butter dough and if rolled decently thick it would make a suitable barrier against gravy. However, this elasticity worried me a bit - pastry is not supposed to act like bread dough, it's supposed to be delicate and finicky, right? Well I discovered that in this case, a touch of elasticity in the dough did not hamper the tenderness or flakiness of the baked product at all, and made rolling out bases and top crusts so much easier. If animal products are on your dietary "do" list, I strongly suggest trying suet for custard or berry pies with a lot of liquid.

Apple Butter Apple Pie

For me, the best part was actually price. While I got my bag of suet (enough for three single crust pies) for free, I found it at my local grocery for $1. After Thanksgiving, they were marked down to 69 cents. If you bake a lot of pies during the holidays, stocking up on this stuff makes sense - keep it in the freezer up to 6 months no problem!

Saturday, July 15, 2017

Almost Foolproof Lemon Curd

Tangy, sweet and decadent, this recipe is almost impossible to screw up!

It seems like no matter where you are, there is always a place for lemon on the  menu. Lemons have a particular ability to lighten up even the recipes that should be cloying - the Alfredos, the cheesecakes, the puddings and the compound butters. Nowhere, it seems, does lemon shine more than the sweet kitchen, since precious few menu items are hindered by the zesty, bright kiss of citrus.

Almost Completely Fool-Proof Lemon Curd

While lemon can be added to desserts simply for sourness (the juice) or as an accent, I love when the citrus gets a real chance to shine. Whenever I need a simple, to-the-point lemon accent on the plate, I almost always go for lemon curd. It's hard to argue with a silky, lick-the-plate sauce like it, rich with butter and egg yolks and a sunny bright as a summer's day. However, for the beginning cook, curds are a little nerve wracking - after all, they are essentially an unbuffered custard of tempered eggs and melted butter.

As I grew and learned as a cook I saw my fair share of lemony scrambled eggs, but within the past year or so I discovered a technique that almost guarantees success. By beating butter, sugar and yolks off the heat first, you give the egg proteins a little "pre cook" (sugar coagulates egg protein) and the butter protects everything from the heat of the pot. Because of this butter "parka", you can actually do the whole cooking process on the stovetop without fear as well - almost unheard of when I was in pastry school. The whole eggs also add a little bit of protection, the whites offering some extra water as a barrier. While the whole mixture takes a few minutes to cook to perfection on the stove, it is 100% worth it - and it stores well in a tightly lidded jar too, should you have leftovers!