
Now, some of you who have been reading this blog for a while might be a little bewildered. I mean after all, I'm 99% vegetarian (I eat fish very occasionally) and haven't touched beef, pork, or chicken to my lips for over 10 years. Besides, I'm a nutritionist, and here I am talking about beef tallow? Well, yes, I am. For one, I was never an "ethical vegetarian" first and foremost - I eschewed meat only after years of my body protesting the digestion of animal protein and high fat food of any kind. While I do care for the wellbeing of animals and the planet, my passion is directed at making sure those animals who are slaughtered for meat do not die for the sake of one or two cuts of meat. In other words, if a cow, chicken, pig or anything else is going to die for the table, I want to do my best to make sure the whole thing can be used to it's greatest potential. Call it my Native North American background, but seeing an animal whose skin is tanned into leather, made into warm clothing or cooked as a snack, whose bones are simmered for stock and whose meat can be almost entirely consumed in one way or another is far more of an ethical treatment for them than a life stuck in a cage or pen.
In terms of nutrition, I was originally as surprised as most people at the breakdown of "traditional" fat products - after all, animal fat gets a bad rap and an even worse mental picture. If I was to mention making traditional lard pastry or Cuban bread to most people my age, let alone entertain the possibility of breaking down chicken carcasses (including feet) for stock or chopping up hunks of beef fat to melt and refine into tallow, I'd be ostracized more so than I was for being an obese, bookish teenager. However, those able to see past the mental imagery of these ingredients as blobs of slimy tissue are treated to not only excellent additions to the pantry for cooking and baking, but fairly healthy options for culinary fats as well. With more poly and monounsaturated fatty acids than coconut oil, less Omega-6 (inflammatory) EFAs than butter and no trans fats (I'm looking at you, shortening), tallow is a fine addition to the culinary world whether you use it for savoury cooking or in the sweet kitchen. In fact, I whipped up a batch of oatmeal cookies with some of the first tallow I rendered to see how it fared - and it was fantastic. High heat stir fries and roasting potatoes were equally ideal uses for this versatile fat.
Anyways, this is how I rendered my own batch of snowy-white tallow, using the guide from Mark's Daily Apple and it's subsequent comments.
Shared with Gluten Free Fridays and Waste Not Want Not Wednesday
Rendering Tallow
Step 1:
Heat the oven to 250F.
Step 2:
Trim the fat completely, removing all attached muscle meat and bloody tissue (this step is crucial, because meat and blood will only burn and ruin the purity of your tallow).
Step 3:
Finely chop the fat and place in a deep, heavy pot like a cast iron Dutch oven. Add 1/4 cup water.
Step 4:
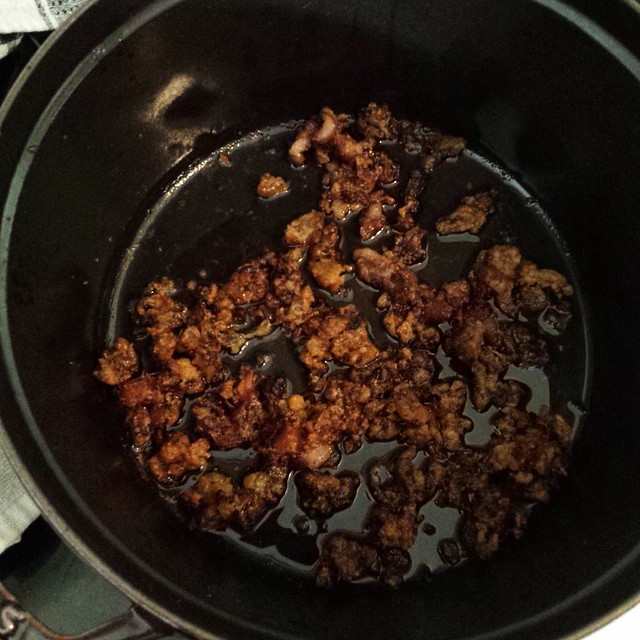
Place in the oven for up to 8 hours, stirring every 2 hours or so. Fat will liquefy slowly and remaining solids will brown and crisp, forming "cracklins" as they release all their fat. Use a slotted spoon to periodically scoop these out so as to not discolour or add undue flavour to the tallow
Step 5:
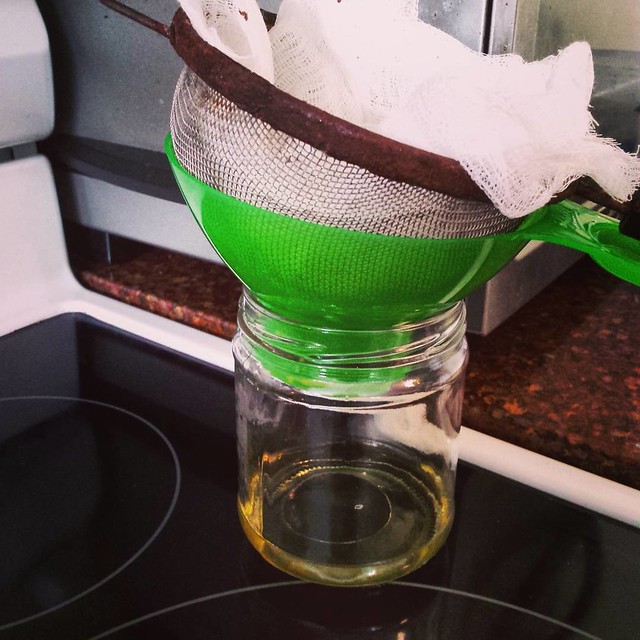
Put about a tsp of coarse sea salt on the bottom of the container(s) you’re going to store it in (the salt will greatly reduce the possibility of spoilage from any suspended moisture or particulate that settles to the bottom).
Step 6:
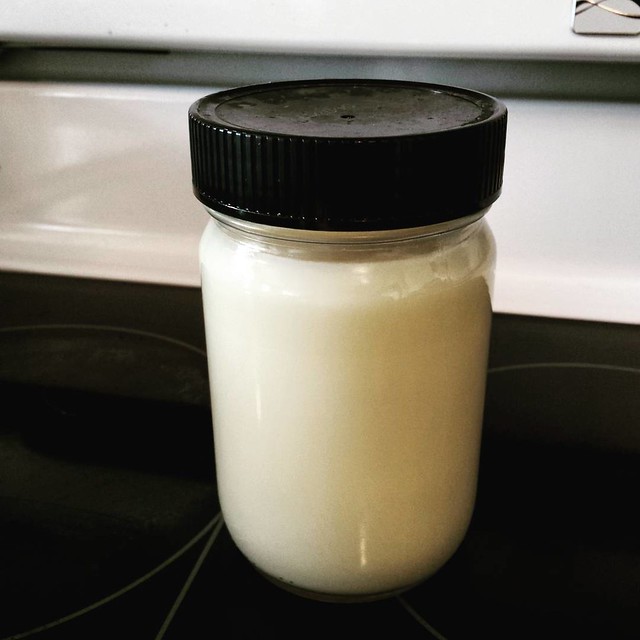
Strain the fat through a triple layer of cheesecloth into clean jars (see photo above). Cover and refrigerate. Cracklins (the strained bits, below) can be discarded, fed to your dog in moderation (they apparently love them) or re-crisped in a pan and eaten if desired.

No comments :
Post a Comment
Thanks for the feedback!