Tuesday, July 30, 2019

Baked Spanish Rice

Baked Spanish Rice is a hearty, healthy meal in a bowl perfect for the winter blahs when hot, but is also delicious cold as a Summer salad! Brown rice is mixed with onion, garlic, red peppers, artichokes and carrots before being doused in a tomato-meat sauce with a heady dose of paprika. An hour and a half of hands off cook time and voila! Dinner is served.


Despite the fact that it can be up to 40 degrees Celsius outside with the humidity, I have been drawn to the kitchen and specifically the oven. Part of this is that I do tend to batch-cook for the week ahead, not just that night's dinner, so I am able to prep food later in the evening when it's cooled off a bit. Another is that I've been spending a decent portion of my summer out of town, so I need to be able to make meals that travel and hold well too. This baked rice, like so many of my recipes, came out of the fact that I had containers of chicken broth and meat sauce sitting in my freezer from back in the school year that I really needed to use up, if only for the reason that I needed freezer space (hello Summer fruit season!). Being a bona fide Spanish rice lover, I wanted to make a version of it that I could throw together and more or less let cook while I gardened and did laundry, and baked rice fit the bill perfectly.

Of course, I was not content with simply making "pure" Spanish rice, the kind that's basically tomatoes and white rice. Nope, I wanted a meal in a bowl, full of flavour, protein and veggies, but light on the oil. We always have artichoke hearts on hand (mom loves them), and onions, peppers and carrots are mainstays in the house too. The crowning spice (and one of my personal favourites) was paprika, and I was not shy with it (dial it to your own tastes though). After an hour and a half - where I literally did nothing - I had a huge pot of food that was excellent warm and cold. While it was a meal in itself, it didn't stop mom from pairing it with some grilled trout for dinner (which honestly looked delicious too!). I will definitely be making this again when school starts back up, maybe with a vegan "meat" sauce for variety as well.

What do you tend to eat in the Summer? Is it no-cook or are you like me and baking up a storm? Let me know in the comments!

Saturday, July 27, 2019

Spinach and Artichoke Pasta Bake

Spinach Artichoke Pasta Bake is a gluten free (thanks to Barilla Pasta) and vegan comfort food casserole for tonight or freezing for later!


The abundance of traditionally "spring" veggies in my Canadian summer garden makes me long for the days of sunny ripe tomatoes fresh off the vine. All my greens are lush and a mainstay of my lunches - spinach, heirloom lettuce and mustard greens to be exact - but the tomatoes are a mid-August crop. Luckily, I do have a stock of canned tomato products at my disposal, and while I was contemplating dinners I spotted a can of artichoke hearts next to them. Inspiration struck, combining the flash-frozen garden spinach with the various canned tomatoes and artichokes to create a hearty yet light on the stomach pasta meal. For protein, I whipped up one of my favourite things to make with silken tofu - a faux "ricotta" that lent the coveted creamy texture to the "spinach-artichoke dip" feel of the recipe and added a hint of cheesy saltiness as well. While mom is not gluten free (I've mentioned several times how much she adores bread) I had some delicious gluten free penne to cook up anyways so I used it here too.

The first forkful definitely captured the feeling of Summer produce for me, especially the sun-dried tomatoes I found in the back of my pantry from last year! Their sweet, almost raisiny goodness brought a delightful taste and texture into play that worked with the brightness of the tomatoes and the slight salty tang of the tofu.

Here's the thing - I love dried tomatoes, and I do make my own at the end of the summer when our grape tomatoes come due for picking. However, the cost of them in the grocery stores (and even in the bulk bin) can be prohibitive. Nate Teague writes for a number of cooking related websites, including Cuisinevault – a site that helps home chefs learn about cutting techniques, ingredients, recipes and much more. In one of his posts, he provides a handy list of options for when you don't have (or can't / don't want to procure) sun-dried tomatoes. Obviously, not every option will work seamlessly, and his article admits that, but gives you a variety of options for almost every application I can think of!

Friday, July 26, 2019

Homemade Fermented Chili-Garlic Sauce

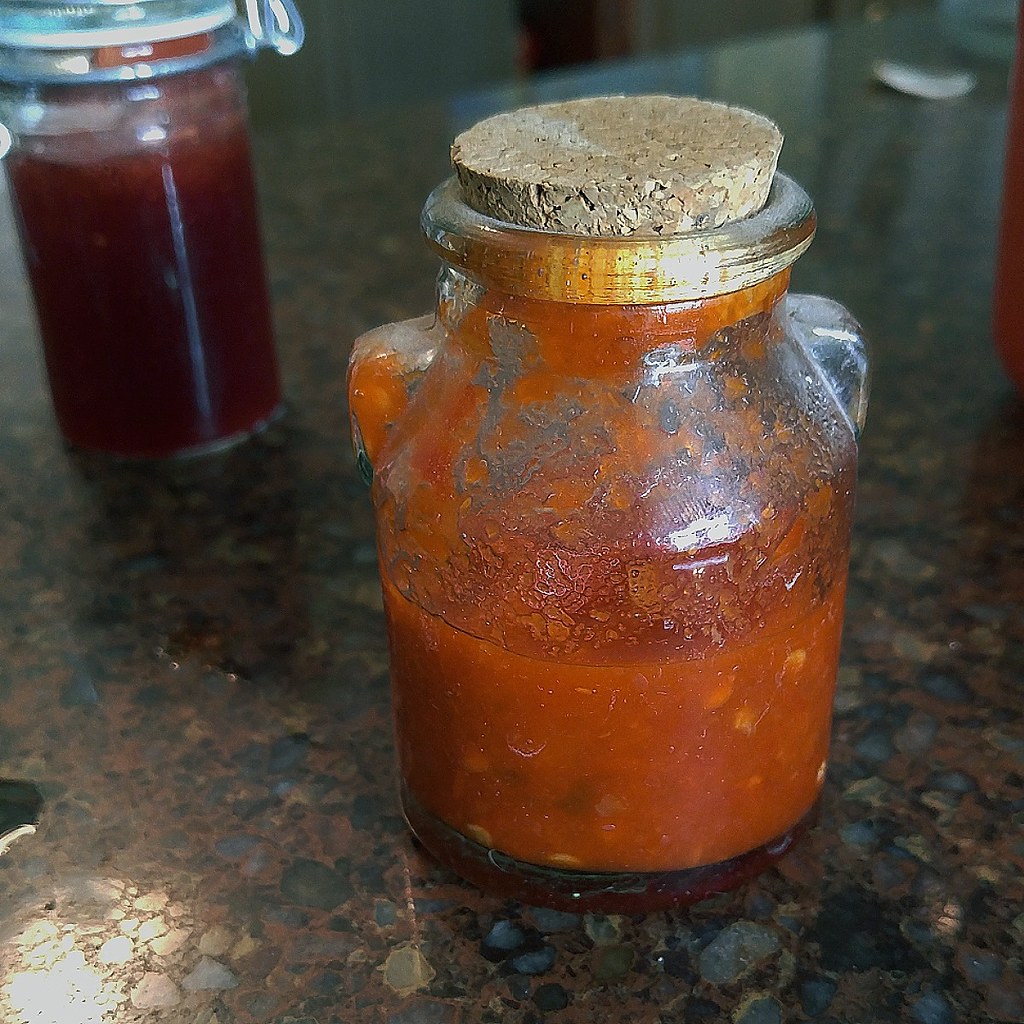
Homemade Fermented Chili-Garlic Sauce (aka homemade Sriracha). A little sweet, definitely spicy and with a little texture from the pureed peppers, this sauce has the perfect tang and "funk" from fermentation too.

Homemade Fermented Chili-Garlic Sauce (aka homemade Sriracha)

It's no secret that I am a hot sauce queen (or is it freak?). At any given time I have at least 4 bottles of hot sauce (different types, obviously) in my fridge and tons of pickled peppers too. Wasabi may as well be ketchup for how much I use it! However, I have limited experience with making hot sauces myself, but with a garden full of various scorching hot peppers I figured it was time! Serious Eats had a fantastic recipe for making a version of Sriracha that intrigued me for a few reasons - one, it used up a whole load of the peppers (yay!) and two, it used fermentation, rather than cooking, to break down the peppers and create the most delicious and complex mixture of flavours.

Now, fermentation is easy - in the sense that you basically do none of the work. I chopped up the peppers in my food processor (for the fact that they didn't need to be uniform size and I also avoided touching them!) and scooped the whole mess into the jar, where it sat for just over a week. All I had to do was stir it once a day and watch the bubbles. Once fermentation was more or less complete, the vinegar and heat are applied and the works is pureed. The result was an absolutely perfect condiment, better than storebought and spicier too (which was definitely dependent on the peppers I used). I canned a few small jars and stuck what I would use immediately into a tiny glass bottle. As far as I can tell, the fermentation stopped after the heat and vinegar were applied, but then again the bottle disappeared in under a week!

Unfortunately, last year I did not have quite the stock (or heat) of peppers we usually do, and this year is likely going to be the same thanks to all the rain. Fingers crossed I'm back to spice world next year!


Fermented Sriracha

Wednesday, July 24, 2019

Creme Filled Chocolate Cupcakes

Creme Filled Chocolate Cupcakes are vegan and super easy to whip up! Filled with a light frosting, its a less preservative-filled way to embrace your inner child!


I am a total kid at heart. In a way, its a definite asset - after all, I'm a teacher (and a Home Ec one at that!). I can't really say my palate has ever been stereotypically "childlike" though - I would gladly order off the "grownup" menu when we went out to eat and saved the fries for fast food runs. That said, during our summer road trips, I longed for those truck stops where my parents would give my sister and I two dollars each and send us to the convenience store for sustenance. While my sister would often go for the chips (she's a Pringles girl) or boxes of Smarties (the Canadian ones), I would always find my way to the baked goods section and load up on whatever looked good and chocolatey.

The jackpot, as I'm sure most of you readers will agree, was finding those cream filled chocolate cupcakes. For $2, I could score four of them, and boy did I hoard them from stop to stop! Looking back, I'm actually surprised I liked them as much as I did - they were very sweet, and probably full of all sorts of "fun" stuff, but like Jos Louis they were irresistible! They actually held such a soft spot in my heart that they came up during a late night conversation with N (my fiance, and yes we're teenage girls at a sleepover some days). I knew I had to try my hand at making some from scratch, and since I had control of the ingredients, I was sure I could find a way to have them turn out better than I remembered. I found a vegan version of the coveted cupcakes by Chloe Coscarelli and set about tweaking it for my needs.

The first batch of cupcakes was a hit - such a hit, in fact, that N brought them to work and one of his coworkers fell in love with it too! When N asked me if it was possible for me to make some for his coworker as a thank you for picking up shifts (and generally being a great guy - Hi A!) I told him absolutely! Luckily if you can make muffins, these cupcakes will be a breeze! A note on the tools - if you don't have / can't find a Bismark tip to fill them, a round tip will work if you poke a preliminary hole with a chopstick.

I love baking for others, and these cupcakes will be on heavy rotation I'm sure - between 82 school kids, a fiance who loves my treats, and all the assorted friends and family there will never be a dull moment!

Monday, July 22, 2019

Chocolate Protein Brownies

These Chocolate Protein Brownies are decadent and moist with only 97 calories a piece! The secret? Whey powder and adzuki beans for protein, fibre and a fudgy texture.


When I was on Weight Watchers in my teens, chocolate was one of my biggest cravings. Since I was a "very busy" highschooler at the time, I got to indulge my craving with low fat brownies from a mix. They were good, I have to say - chewy and fudgy, with a crinkled top like "normal" brownies.It's been years since those brownies were in my fridge, but since I have a few friends on the weight loss journey (and doing darn well!) who are also chocoholics, I thought it might be worth a shot to try my hand at a healthy, yet still decadent option.

Bean brownies are nothing new, but they have longevity for good reason! Instead of chickpeas (like the recipe I used as my jumping-off point) or black beans (like this equally good recipe), I turned my attention to a bean that is more traditionally used in Japanese desserts - adzuki. These small, dark red beans have an awesome sweet starchiness about them, which worked incredibly well mixed with the bitter cocoa and coffee. To up the protein a bit more, I used a generous helping of chocolate flavoured Optimum Nutrition Protein Energy, a protein powder I keep on hand for baking and adding to oatmeal (I still prefer Nuzest for drinking straight). Without eggs (or sugar), getting the coveted crackly top would be tough. However, a sprinkling of fine sugar over the batter worked wonders! Once the bars were sliced, it was clear that they embodied the rich fudginess I remembered from my youth. They also freeze exceptionally well, and wrapped individually make exceptional lunchbox treats for camp, school or work! By the way, if you are making these for kids, use hot chocolate or even milk for the coffee and use a plain protein powder to minimize the caffeine.

Saturday, July 20, 2019

Ginger and Sesame Honey Cake

Ginger and Sesame Honey Cake is a perfect sweet for teatime, filled with a balance of nuttiness and floral notes.


Up until recently, I was fortunate to have a lovely co-worker who not only was an amazing artist (and art teacher) but had her own apiary on her property. Come Christmas and the end of the school year, she gave me pint jars of honey from her bees, which was delicious right out of the jar (and off the comb). However, that didn't stop me from stirring it into tea or drizzling on rice cakes, and when I had just the bottom of the jar left I whipped up this absolutely delicious, Asian-inspired cake with it.

This cake has the unmistakable flavour of honey (read: use a good, intense one) and it pairs beautifully with the nutty sesame seeds and sharp ginger. The yogurt, as well as the honey, will keep the cake impossibly moist. Although honey is about twice as sweet as sugar, it isn't cloying here thanks to it not being the only sweetener. Next time I make it I'd likely doll up the top with candied ginger curls for presentation's sake, but it really doesn't need it - this is the epitome of a snacking cake and is perfect with a cup of green tea in the afternoon, or if you're feeling really decadent, for breakfast! 

Friday, July 19, 2019

Wheat Hot Dog Buns

 Homemade hot dog buns are soft, fluffy and so easy to make, needing only one rise and no shaping!


Moving on from soup, I finally have a more or less seasonal post for you all! While I did not grow up
on homemade bread and buns, I do have fond memories of grilled hot dogs eaten sitting on our sailboat as a child, whether the hot dogs were in buns or chopped into Kraft Dinner was simply a matter of the heat outside. However, I felt then (and still do now) that a lot of the storebought buns are either malleable sponges (yes, I'm looking at you, Wonder Bread) or gritty, dry whole wheat logs posing as a healthier option. 

I set out to make a quick (1 1/2 hour) recipe for hot dog buns that is soft without being spongey and with enough whole wheat for flavour and texture without turning your mouth into the Sahara. After a few trial runs, I developed these buns (that are a perfect length for the "big franks" or sausages) that not only require just a single rise, but that need essentially no shaping either. The soy milk feeds the yeast and allows the bread to rise into magnificent buns, while the oil and agave (or honey) keeps them tender even after freezing them. Toasted, the richness of the whole wheat comes through and makes for a perfect accompaniment to your next grill out, or making sub sandwiches too! Unfortunately, you will need a scale to make this accurately, and if you're not feeding an army (or have limited freezer space amongst all that ice cream!) the recipe halves well as well.


Wednesday, July 17, 2019

Leeky Carrot and Rice Soup

Leek and Carrot Soup is full of spring flavour, and the abundance of veggies, lentils and whole grain rice makes it a healthy, not to mention delicious, lunch!


Yes, I know we are in the throes of Summer. However, as someone whose body temperature drops when she eats (don't ask, I don't get it either), soup is always a possibility when it comes to mealtimes. However, I also appreciate that heavy, hearty soups are really too much for July weather, so after a trip to the local farmer's market I (re)made this soup. I say re-made because I originally made (and photographed) this recipe last March, but never got around to posting it. Good thing too, because it allowed me to tweak it and the changes are reflected in the recipe below. The recipe is also easy to veganize, should you choose to do so, but for a more "cock a leekie" experience I suggest a rich chicken stock (I used homemade) and butter.

The simplicity of this soup really allows the vegetables and herbs to shine. In the height of Summer (if you have it in your garden) use fresh herbs with abandon (except oregano, which for some reason bitters the soup when fresh) and of course, the best veggies you can find. Since my garden hasn't quite exploded with produce yet, I used my farmer's market haul, and supplemented the mix with garlic scapes (from my fiance's garden) and my Egyptian Onion bulbs. Use what looks good and you'll be laughing!

P.S.: If you like your soup with a kick (like a certain blog writer... ahem), use chili oil (like my favourite) to saute and stir in a dash of Tabasco at the end!

Monday, July 15, 2019

Pineapple Drops

Pineapple juice makes this hard candy taste like honey, and with a tiny cube mold making lots is easy!


If you could believe it, I used to be deathly afraid of boiling sugar. Like my (still unresolved) fear of hot oil, I was burned by molten sugar syrup when I was younger, and avoidance seemed like the best tactic. Of course, now that I've been making and canning other splattery things like jam, I have developed more or less asbestos hands and while I can't say I've escaped unscathed I do know how to be a bit smarter about the substance! 

In possession of a can of pineapple juice (left over from stir fry night), I decided to see if I could somehow convert it into a candy. I had a feeling that gummies would be out due to their gelatin base, but I wondered if hard candy would work. Well, I can safely say it does - and while the finished candy tastes nothing like pineapple, it does taste like the most divine honey in solid form! It's a good thing I picked up a tiny silicone ice cube mould for this recipe, otherwise they would be taking up permanent residence around my waist!

Saturday, July 13, 2019

Quick Marshmallow Fluff and Fluffernutter Fudge

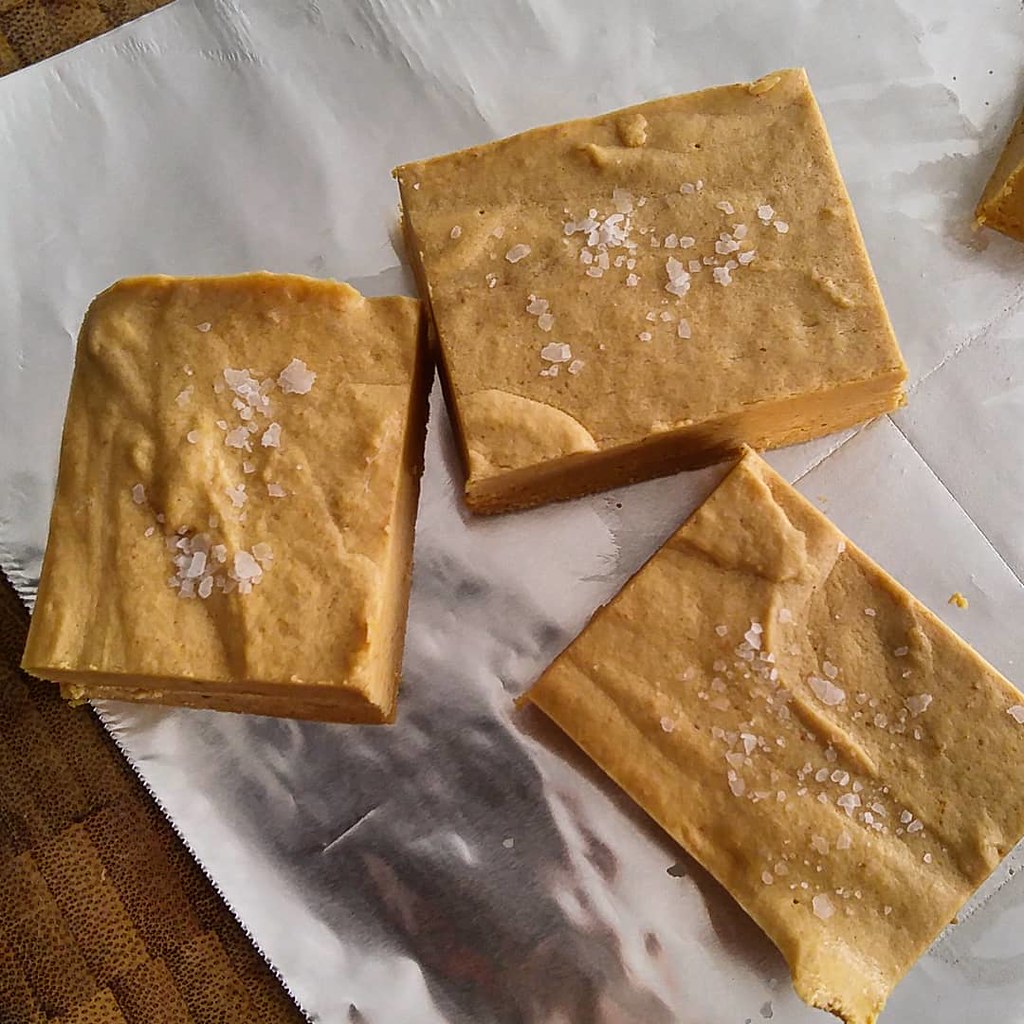
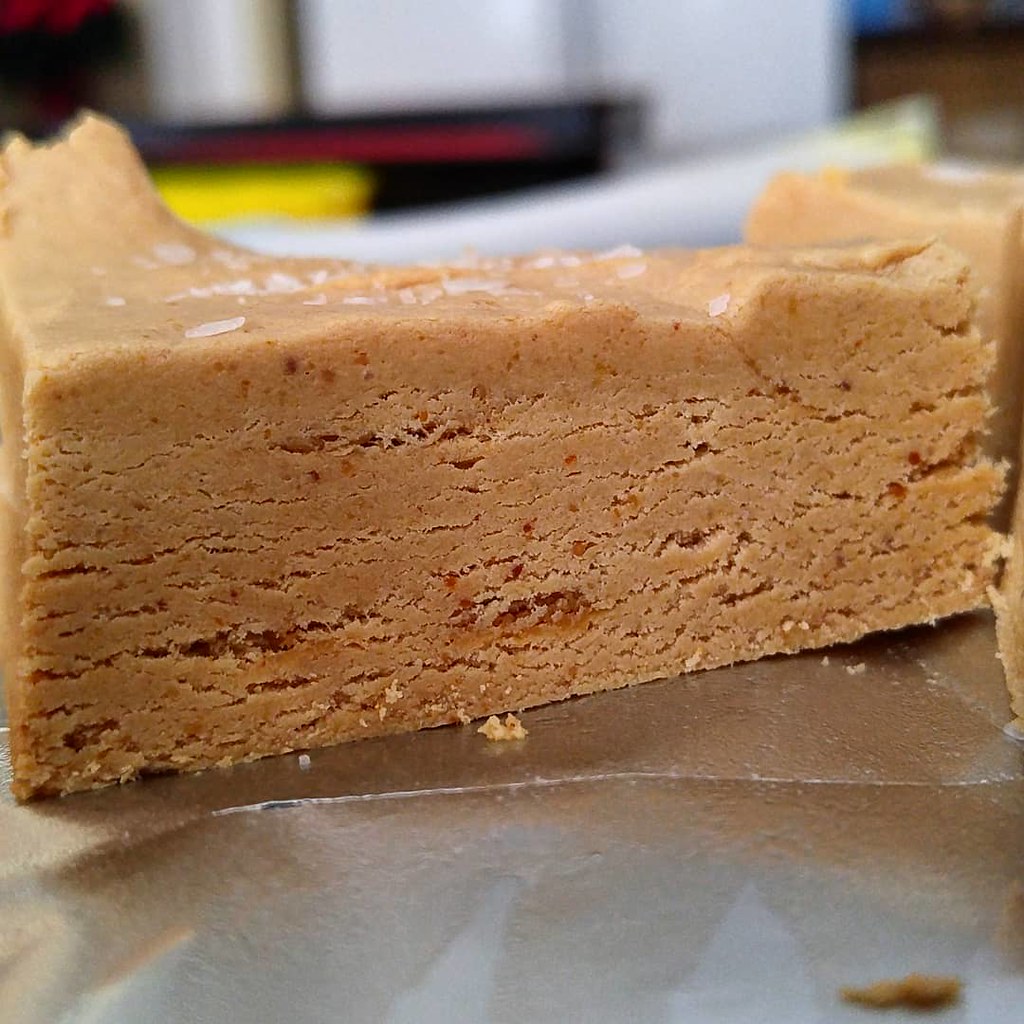
Fluffernutter Fudge is a great use for unsweetened, natural peanut butter. A sprinkle of salt balances the sweetness. Gluten free and dairy free to boot!

Fluffernutter Fudge


My summers as a kid were always filled with campfires of some sort. First were the communal fire pits on Beausoleil Island, where all us boaters would rotate bringing wood and we'd gather with skewers, graham crackers and marshmallows. Being allowed to "play with fire" was arguably the coolest part of the summer, and when I was old enough to babysit I would occasionally buy my own bag of marshmallows so I didn't have to share!

Oddly enough, only my grandparents ever had mini marshmallows that I can recall. Even if we were making Krispie Squares, it was always the big ones because us kids could just grab the remaining ones for snacks. Only recently did I purchase a bag of them to make cookies, but after using what I needed, I still had a bunch left that were starting to do what mini mallows do - turn into sugary pebbles. Not really wanting to go the traditional route (and having no cereal), I came across a method for turning the marshmallows back into their "fluff" form - perfect for my favourite marshmallow application, fudge!

Marshmallow Fluff in my possession, I set about making a small (read: manageable to eat) pan of peanut butter fudge. Why peanut butter? Well, for one, it's rich and somewhat salty, which counteracts the overbearing sweetness of most marshmallow based fudge I've had. For another, it's inherently creamy, so small pieces satisfy (and it lasts longer!). This fudge is layered with peanut flavour too, thanks to the use of peanut flour in addition to the natural peanut butter (yes, natural worked here!). To offset any residual cloying sweetness, I sprinkled some flaky Kosher salt over the whole thing.

Fluffernutter Fudge

A tiny taste of the finished candy brought back waves of nostalgia for the treats of summer and fall fairs. Perfectly peanutty, just sweet enough, and melt-in-your-mouth good, I have no qualms about making it again - and if I can't find the Fluff (it's hit and miss around here) I can whip up my own!

Friday, July 12, 2019

Baklava Swirl Bread

This is no ordinary swirled loaf - the lusciousness in this whole grain bread is leftover filling from Nut Free Baklava plus an extra drizzle of honey for luck! The dough even gets an extra hint of decadence from orange flower water and toasted sesame oil.


Remember the filling from my delicious Nut-Free Baklava? Well, I had leftovers on my hands, and since our stash of bread was running low, I figured what better use than in a swirled bread? I don't often go "overboard" on the decadent loaves for mom, especially since that we're well into the short sleeve and shorts weather, but once in a while it serves as a nice treat! This bread is a heavy adaptation from the Cinnamon Swirl Bread on Pinch of Yum, which looked decadent and one I'm definitely going to make in the future!

Since I was making bread with a baklava-style swirl, I figured I would pull in some other Greek(ish) flavours with the dough. A dash of orange juice and orange flower water added a light fruity and floral note, while toasted sesame oil shone through with a nutty tone. Using yogurt instead of water kept the dough impossibly soft and tender, which was a great contrast with the crunchy bits in the filling. It's a good thing this recipe makes two big loaves, because my mom couldn't wait to dig in - they were barely room temperature by the time she cut into them!

Thursday, July 11, 2019

Nut-Free Baklava

Yes, nut free baklava is possible! The filling for this decadent flaky pastry is a mix of nut free granola, sunflower seeds and buckwheat kernels pulsed with raw honey and spices, while the syrup is honey and sugar with a splash of rose and orange flower water. Rolled, rather than stacked phyllo ensures the filling stays put and slicing is easier too!


Baklava is a definite crowd pleaser - I honestly don't know a single person who truly abhors the sweet, sticky, flaky pastry once they've tried it! Since my grade 7/8 class at work was putting on Mamma Mia! as their school play, they asked if I could make the dessert option for their refreshment table. Of course, I agreed, and the subject of baklava came up. However, there was a big, glaring "BUT" in this plan. As per school policy, there could be no nuts involved.

Not to toot my own horn (okay, kinda to toot my own horn), this challenge didn't faze me at all. While the previous Home Economics teacher had mentioned that there was "no way" the dessert could be made without nuts, I have had previous experience in doing just that. I took the same principles and adapted them to a more traditional baklava application (involving the syrup component). To save on mess and make for a somewhat neater presentation, I rolled the sheets of filled phyllo instead of stacking them, which both ensured an even distribution of filling and an easier cutting job. The rolls also absorbed the syrup a little more thoroughly, creating bites of pastry that were sweet without being wet-wipe sticky.

Now, I will not say this is a "quick" dessert. I made it the morning before it needed to go into the school so it had a full 24 hours to absorb the syrup, but all told it took about 1 1/2 hours to put together from start to finish. Do make the syrup first - it needs to cool to room temperature and this way it stays out of the way! Any leftover filling and phyllo can be made into "muffin tin" baklava snails (my mom loved those as her "treat" and they also gave my fiance a chance to taste the dessert for the first time), and the filling can also be frozen and used as a mix-in for bread or cake filling. Make no mistake, the next time I get a chance, this is going to be back on the dessert table.

Wednesday, July 10, 2019

Lasagna Soup

This Lasagna Soup is a veggie filled delight for your stomach and tastebuds, and is vegetarian to boot! Enjoy the classic baked pasta taste without the fuss of layering.


I was always a sucker for my mom's lasagna. To this day, I have yet to find one that matches hers, and I actually despise most restaurant lasagna or storebought frozen stuff now. While I know how to make some pretty darn good stuff myself, I rarely do because of the time the assembly job takes. Coupled with the 30 degree (Celsius) heat outside, the oven is staying off!

That said, the family had a hankering for lasagna this week, so I came up with the next best thing - a (relatively) quick cooking Lasagna Soup! The tomato sauce-laced broth is full of all the veggies and noodles found in my mom's traditional lasagna, with a hint of cheese stirred in at the end for a little bit of creaminess and flavour. For protein, I relied on the broken remnants from a bag of TVP chunks, a staple in my pantry. Using the broken bits made them the perfect size for this application, and since they re-hydrate in the broth they helped thicken the mixture to a soupy stew consistency. From start to finish the pot of soup was ready in an hour, and the consensus was that it was as good at room temperature as it was hot from the pot. Since we're staring down a stretch of sunny, hot days and just cool enough nights where microwaving leftovers is more common than not, I have a feeling this recipe may be on rotation quite a bit!