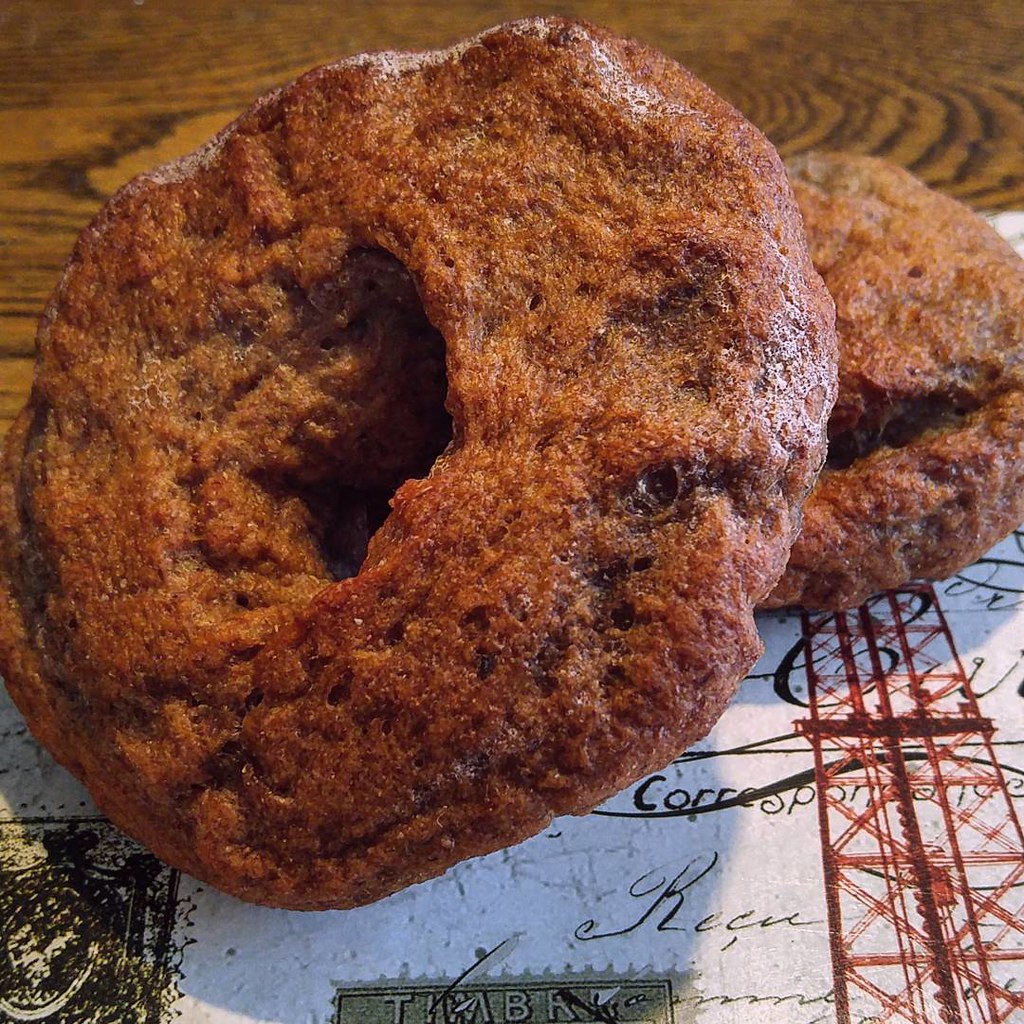
Bagels with a delicate pink hue and a touch of earthy (beet-given) sweetness are chewy and whole grain - perfect for breakfast!
I've been seeing a lot of people getting into baking these days while we're all stuck inside, and I for one am all for it! As a Home Economics teacher I am so used to hearing that my art is "long lost" and unnecessary in today's world of easy-to-find consumables. These days have seen a resurgence though, and while yeast is still impossible to find (thankfully I have a stash) for those of you who have scored the precious microbes I am hoping to finally catch up on documenting all the breads I had languishing in posting purgatory.
First up (because I just baked a batch of different bagels) are these cute, pink, beet infused bagels. Some of you know I grow a ton of heirloom beets every summer (well, maybe not this summer if I can't get seeds) and while I love them raw, I also roast up a bunch of them for various applications, including pickles, conserves and baking. I've made loaves of beet bread in the past, but when it came time to make holiday gifts for one of my coworkers back in 2018 (yup, told you this was an ancient recipe waiting for publication) I wanted to come up with something more portable that she could take with her to work for lunch or a snack. Thus, these bagels were born, based on a recipe I found on Discover Delicious.
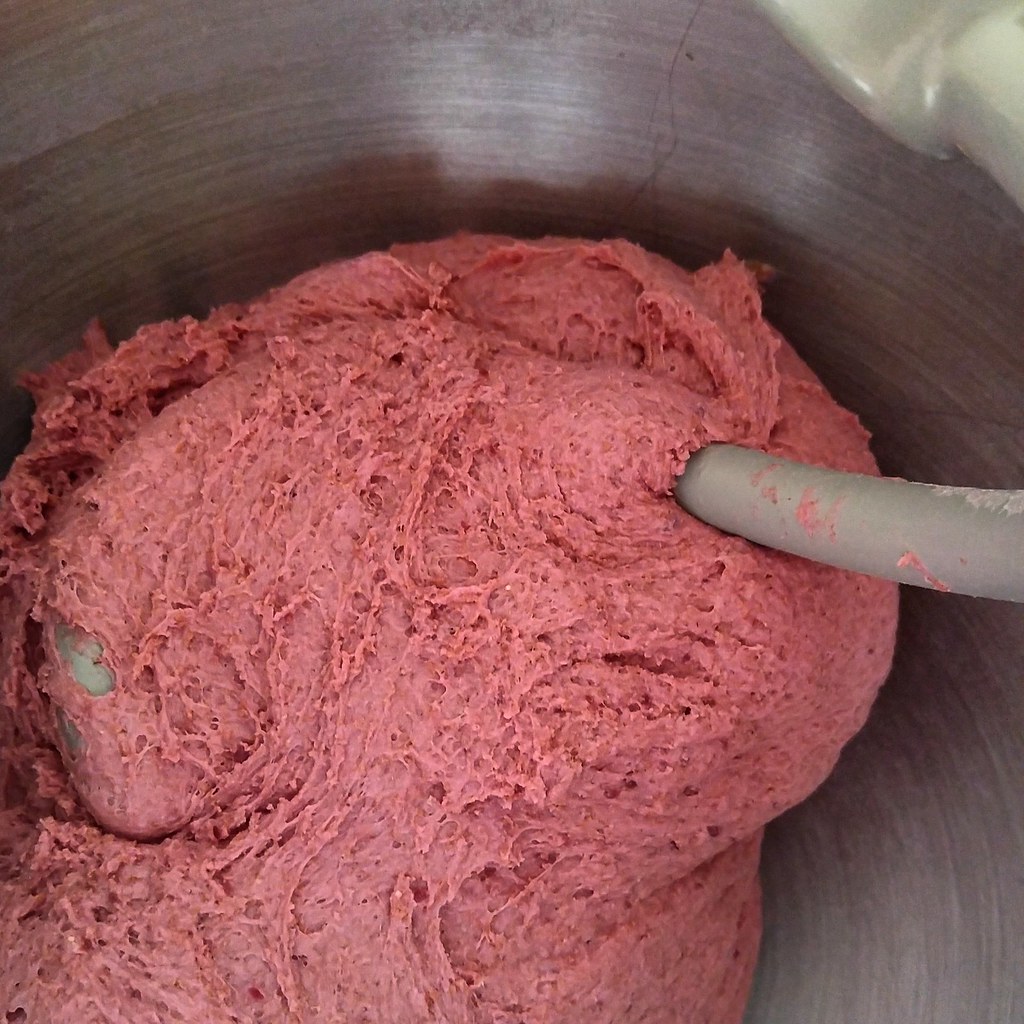
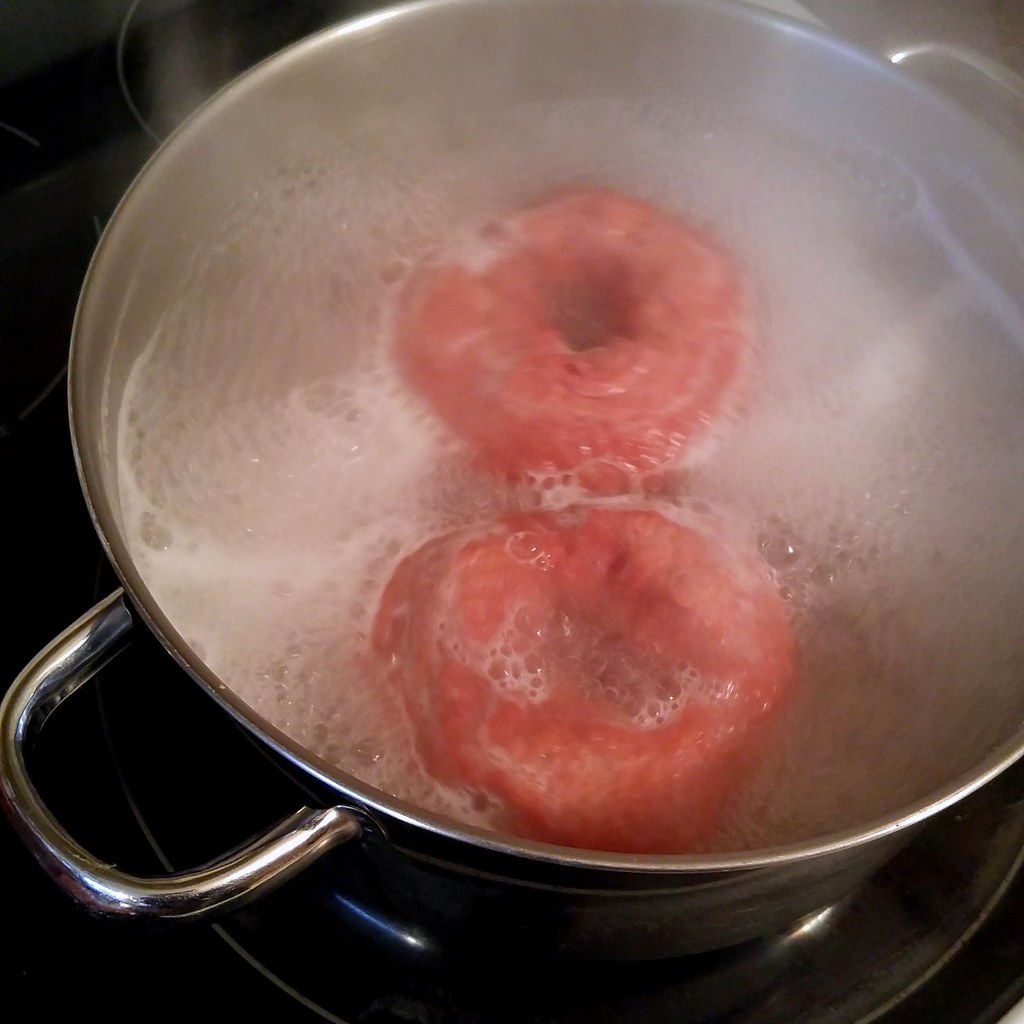
The recipe won me over with the colour - I mean how can you not be drawn in by that pink hue? The recipe also appealed to me flavour wise as it used a pre-ferment, which like the much-adored sourdough allows part of the flour to absorb the water properly and ferment, giving the dough a delicate tang and smoothness. Malt powder is totally optional, but I added it because I had it on hand and felt it gave a "bagel-y" nuance to the finished product too. Like all good bagels, these are boiled in honey water before baking, which makes them chewy, shiny and perfect for slicing.
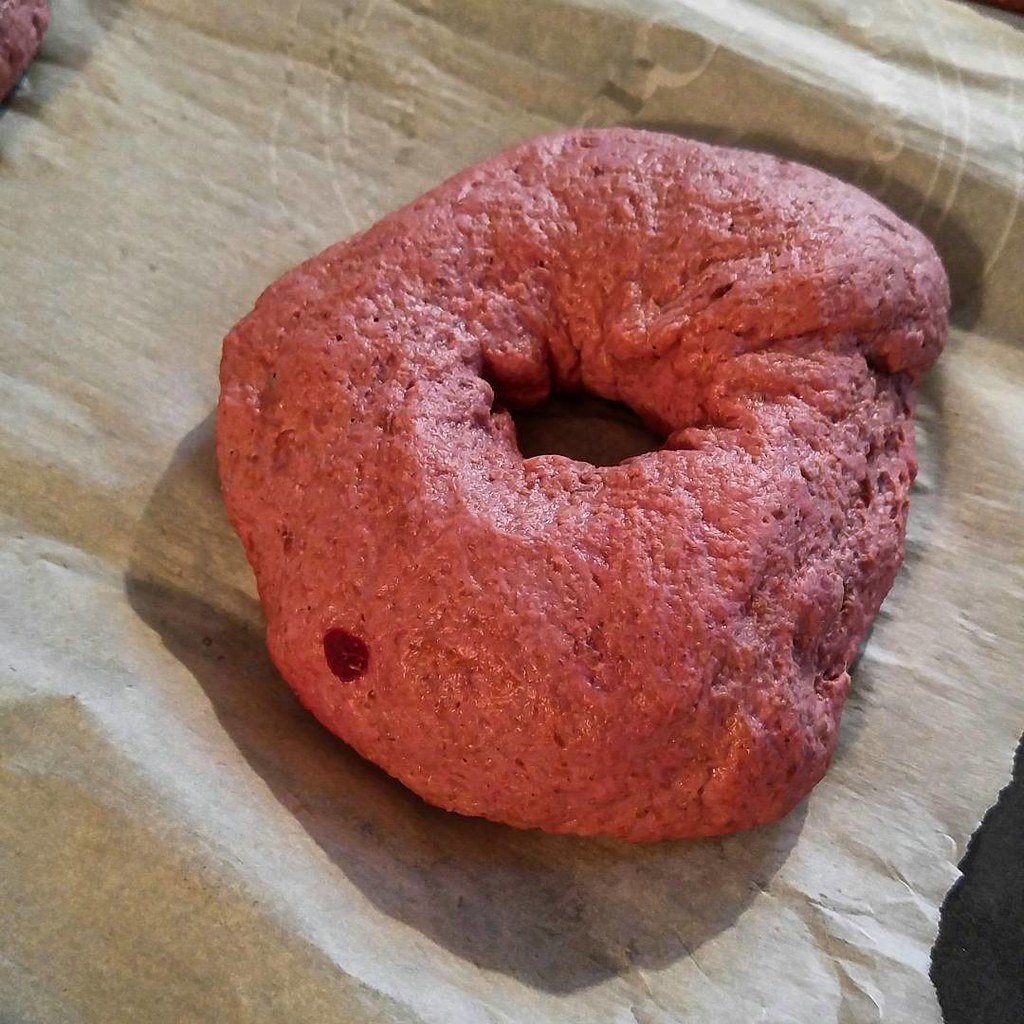
In the end, these bagels were everything I hoped for - a great size, chewy, with a delicate nuttiness from the whole wheat and an earthy sweetness from the beets. They took time to make (needing an overnight retardation in the fridge) but boy were they worth it, and I would 100% make them again.
What have you been baking these days? Anything new to cope with being isolated? Comment below!
Monday, April 20, 2020
Friday, April 17, 2020
Maghmour
Maghmour is known as Lebanese moussaka, and is a thick,
smoky eggplant and bean stew packed with peppers, onions, tomatoes,
smoked paprika and mint. I added a hefty pinch of pepper flakes to my
version and served it over a rice and quinoa base for a hearty meal in a
bowl that is the perfect comfort food in these troubled times.
While it may be Spring according to the calendar, it sure doesn't feel like it! Just yesterday while I was teaching (e-learning is going surprisingly well on my end any way) the kids and I all stopped for a moment to appreciate the blizzard that appeared out of nowhere and disappeared just as fast! The chill in the air also remained, although we are hearing that it will warm up eventually. Until then (and definitely until life gets back some semblance of normal), comfort food is on the menu. Mom is a huge eggplant fan and when I saw a recipe featuring it (and lots of other favourite Mediterranean things) I knew she'd adore it. Luckily, we have enough grocery stores near us that the wait is never too too long, but I still tried to keep the list to what was in our fridge and pantry (namely onions, peppers, tomatoes, chickpeas and grains) and throw as much flavour as I could at it. In this case, I am very lucky to have a well-stocked spice cupboard so things like dried mint and Aleppo pepper just are, but if you want to make this and don't have those things on hand either leave them out or throw thyme or basil or parsley at it - it will all taste good and you'll have a healthy meal on hand for when you can't be bothered to cook (or shop) again.
Like I said, this recipe is forgiving - don't have or want chickpeas? Use another legume (lentils, kidney beans) or swap them out for 3 cooked, diced chicken breasts folded in at the end. Or leave out the protein completely and serve it alongside - I've heard that it pairs well with pork tenderloin too.
Here's to better (and warmer) days ahead - we can only go up from here!
While it may be Spring according to the calendar, it sure doesn't feel like it! Just yesterday while I was teaching (e-learning is going surprisingly well on my end any way) the kids and I all stopped for a moment to appreciate the blizzard that appeared out of nowhere and disappeared just as fast! The chill in the air also remained, although we are hearing that it will warm up eventually. Until then (and definitely until life gets back some semblance of normal), comfort food is on the menu. Mom is a huge eggplant fan and when I saw a recipe featuring it (and lots of other favourite Mediterranean things) I knew she'd adore it. Luckily, we have enough grocery stores near us that the wait is never too too long, but I still tried to keep the list to what was in our fridge and pantry (namely onions, peppers, tomatoes, chickpeas and grains) and throw as much flavour as I could at it. In this case, I am very lucky to have a well-stocked spice cupboard so things like dried mint and Aleppo pepper just are, but if you want to make this and don't have those things on hand either leave them out or throw thyme or basil or parsley at it - it will all taste good and you'll have a healthy meal on hand for when you can't be bothered to cook (or shop) again.
Like I said, this recipe is forgiving - don't have or want chickpeas? Use another legume (lentils, kidney beans) or swap them out for 3 cooked, diced chicken breasts folded in at the end. Or leave out the protein completely and serve it alongside - I've heard that it pairs well with pork tenderloin too.
Here's to better (and warmer) days ahead - we can only go up from here!
Sunday, April 12, 2020
Nana Cake
N used to eat a variation of this cake every year for his birthday, when his nana made it for him. Today's revamp is a rich, whole grain spice cake topped with homemade blueberry pie filling and Chantilly cream. Different yet decadent!
In the midst of all this last-minute "re-learning" with online schooling - as both teacher and student - March and April have basically been non-starters for writing on this blog. If you are still tuned in, thank you for your patience! I have been cooking here and there (despite how difficult grocery shopping has become) and you can always find my latest yums on Instagram as well - I will get to the recipes on here one day!
Anyways, this cake is far more than it's relatively simplistic construction. N's birthday was back in December (see how far behind I am?) but when I asked him what kind of cake he wanted, he told me a story of the kind his grandmother used to make for him right up until she passed away. It was simple in essence - a baked box-mix cake topped with a can of pie filling and a tub of Cool Whip - but he adored it and confided that he wished he could have it again. When I asked if a homemade version would suffice (I hate box cake mix as a rule - not because of the ingredients but because of the sound our hand beaters make mixing it) he was excited and gave me free reign, as long as it wasn't chocolate. Perfect - I had a ton of odds and ends around the pantry and fridge after a month of sweet baking with Home Economics, so I quickly settled on a spice cake, and the ends of that fall's blueberries that I had frozen became the filling.
Of course, I can't set out baking something and not tweak it! I knew I wanted to keep the flavour profile relatively rustic and traditional, so I went with a combo of oats and whole wheat flour in addition to the "white" stuff and used my own (homemade) pumpkin pie spice to add fresh and pronounced flavour. The pie filling was kissed with spices and orange and capped off with a tiny dose of orange flower water for just a little touch of flair. Both components also took advantage of the toasted sugar I had made up every few months after discovering the recipe and I'm glad I made that call - everything smelled cozy and warming.
I toted all three components - cake, filling and whipped cream - separately to his place and assembled the "nana cake" there. Let me tell you - it didn't last very long, even with the rest of the seasonal sweets abounding!
Monday, March 16, 2020
Double-Glazed Caramel Cinnamon Rolls
When you need to celebrate but don't like cake, why not make these indulgent, brioche like cinnamon rolls the star? They stay soft for days thanks to a hefty dose of cream, butter and a hint of caramel in the dough, while a double glaze - first honey butter right out of the oven, then cream cheese frosting after they cool for an hour - adds even more decadence.
Now, I have made cinnamon rolls several times before - from coffee laced to minis to my piece de resistance of laminated cream cheese and granola - but these I kept more or less basic in flavour with enough twists to the formula to keep them soft, moist and sweet for days. My first trick was using cream - not milk - to make the dough, which began the enrichment process, followed by a hefty dose of butter, eggs and the second secret - caramel sundae topping. The thick inverted sugars in the caramel prevented the dough drying out like it would with regular sugar and added a complex hint of flavour and colour that you won't get anywhere else. A splash of vanilla and pinch of nutmeg rounded out the sweet dough, making it perfect on its own. But since they are cinnamon rolls, they demanded a filling, and I kept that simple with butter, sugar and cinnamon.
Onto baking, which was no different than a smaller batch of rolls with the exception of a little more monitoring. The batch made 24, which could be done in two 9x13 pans, but I found a lovely foil roasting pan at the dollar store which fit them perfectly and kept transport easy! To compensate for the middle rolls getting less heat and possibly being underdone, I heated my smaller pizza stone on the rack before putting the raised rolls in, which blasted the middle of the foil pan with heat and ensured even baking. It would probably work without it, but better safe than sorry!
Finally, while the rolls were baking and smelling heavenly, I prepared the pre-glaze that would go on the hot buns right out of the oven. This was a little trick I picked up from either Serious Eats or The Kitchn (can't remember which, sorry) where they double frosted the buns. Not wanting the "gooiness" to be too hard to manage (these people work with furry creatures after all) I stuck to a simple vanilla, honey, butter and cream mixture which soaked into the bread and sealed in the rich, soft and fluffy nature of the rolls. After they cooled completely (on the counter overnight, which was torture but please don't refrigerate yet!) I heated up about 1 ½ cups of my cream cheese buttercream until just runny and spread it roughly over the rolls just to cover each. The leftover frosting was tinted and used for piping - purely optional, but if you're going to celebrate go whole hog!
Now, I know this recipe makes a lot of buns, but you can halve it to a more manageable 12 or even make the whole recipe, place in two pans and freeze after the first rise and shaping for up to 3 months. When you have a craving for sticky bun goodness, thaw the frozen pan overnight in the fridge, let rise on the counter for 45 minutes - 1 hour then bake and double glaze as usual. Problem solved!
With all the insanity going on in the world today, it's hard to remember that there are still celebrations to be had! We are in the thick of birthday season (as I call it) here - between the beginning of March and the end of April there are no fewer than 6 birthdays in the family, mine included! In addition to the birthdays, lots of other little "yay days" are still going on, and now that I'm stuck at home for at least three weeks while the schools are closed I have become the de facto baker for them.
One of my proudest achievements - besides my mom's requisite birthday cake - was this ginormous batch of fluffy, rich cinnamon rolls for my sister's work. One of the vet techs at her clinic, Kelly, was celebrating 20 years of service - a huge accomplishment for a field where burnout and turnover are sky high. However, Kelly is not a fan of cake in any form. I can't fault her for that, to each their own, and when they asked what she did like she said the one thing that spoke to my soul: cinnamon rolls.
Now, I have made cinnamon rolls several times before - from coffee laced to minis to my piece de resistance of laminated cream cheese and granola - but these I kept more or less basic in flavour with enough twists to the formula to keep them soft, moist and sweet for days. My first trick was using cream - not milk - to make the dough, which began the enrichment process, followed by a hefty dose of butter, eggs and the second secret - caramel sundae topping. The thick inverted sugars in the caramel prevented the dough drying out like it would with regular sugar and added a complex hint of flavour and colour that you won't get anywhere else. A splash of vanilla and pinch of nutmeg rounded out the sweet dough, making it perfect on its own. But since they are cinnamon rolls, they demanded a filling, and I kept that simple with butter, sugar and cinnamon.
Onto baking, which was no different than a smaller batch of rolls with the exception of a little more monitoring. The batch made 24, which could be done in two 9x13 pans, but I found a lovely foil roasting pan at the dollar store which fit them perfectly and kept transport easy! To compensate for the middle rolls getting less heat and possibly being underdone, I heated my smaller pizza stone on the rack before putting the raised rolls in, which blasted the middle of the foil pan with heat and ensured even baking. It would probably work without it, but better safe than sorry!
Finally, while the rolls were baking and smelling heavenly, I prepared the pre-glaze that would go on the hot buns right out of the oven. This was a little trick I picked up from either Serious Eats or The Kitchn (can't remember which, sorry) where they double frosted the buns. Not wanting the "gooiness" to be too hard to manage (these people work with furry creatures after all) I stuck to a simple vanilla, honey, butter and cream mixture which soaked into the bread and sealed in the rich, soft and fluffy nature of the rolls. After they cooled completely (on the counter overnight, which was torture but please don't refrigerate yet!) I heated up about 1 ½ cups of my cream cheese buttercream until just runny and spread it roughly over the rolls just to cover each. The leftover frosting was tinted and used for piping - purely optional, but if you're going to celebrate go whole hog!
Now, I know this recipe makes a lot of buns, but you can halve it to a more manageable 12 or even make the whole recipe, place in two pans and freeze after the first rise and shaping for up to 3 months. When you have a craving for sticky bun goodness, thaw the frozen pan overnight in the fridge, let rise on the counter for 45 minutes - 1 hour then bake and double glaze as usual. Problem solved!
Wednesday, February 26, 2020
Cookies Made Fancy with the @empossedpin #empossedpin
This beautiful Paisley embossed rolling pin from @embossedpin is not only so stunning you'll want to keep it on display (no junk drawer designation here!) but the solid beech wood cleans easily and works on even the softest, most finicky dough. I tried it on my mom's shortbread recipe (notorious for getting stuck in cookie cutters) and the design imprinted cleanly and there was almost no cleanup - simply using a pastry brush to clean off the flour and a quick wipe with a damp sponge and it's good to go again! Check out all the offerings on their website
I'll let you in on a little secret - I hate rolling dough out. I don't know why. Maybe I can't get the consistency just right, I make the dough too thin, something just doesn't work. However, I'm also a sucker for beautiful things, especially those made of wood. When I was approached by Embossed to test and review their rolling pins, I was a little apprehensive as to how they'd work - after all, if I have trouble with a smooth rolling pin, this would spell disaster, right?
Thankfully, I was wrong - very wrong. These rolling pins, though on the shorter side, are etched to the perfect depth. Not too shallow where the print (I had a fantastic paisley print one, but they make a variety of styles) won't show up, but not so deep the dough sticks, tears and makes a mess. I used this pin on my mom's shortbread cookie dough, which is notorious for sticking, and I had absolutely no problems after I dusted the dough with flour. The print stayed clear and crisp even after baking, and I got so many compliments on the cookies! The other thing was these rolling pins are incredibly easy to clean. A quick wipe with a damp cloth took off the flour from the external surface, while anything stuck in the crannies (I had maybe 2 clumps) I let dry and brushed off with a pastry brush. The pin is so beautiful it stays on my counter permanently and because the beech wood of the embossed rolling pin is not stained or treated (they are 100% food-safe and free of BPA or any other toxic substances) I don't have to worry about it discolouring, flaking, leaching or otherwise looking sad and forlorn. I am currently looking at finding an easel stand for it so it can be in the pride of place.
If you love beauty and function in a simple and easy to use package, I highly recommend one of these rolling pins from Embossed. You can also feel great knowing you're supporting a small business invested in making beautiful things for the every day person that will last a lifetime!
Please look below for more info:
How to use the rolling pin
FAQs about Embossed
I'll let you in on a little secret - I hate rolling dough out. I don't know why. Maybe I can't get the consistency just right, I make the dough too thin, something just doesn't work. However, I'm also a sucker for beautiful things, especially those made of wood. When I was approached by Embossed to test and review their rolling pins, I was a little apprehensive as to how they'd work - after all, if I have trouble with a smooth rolling pin, this would spell disaster, right?
Thankfully, I was wrong - very wrong. These rolling pins, though on the shorter side, are etched to the perfect depth. Not too shallow where the print (I had a fantastic paisley print one, but they make a variety of styles) won't show up, but not so deep the dough sticks, tears and makes a mess. I used this pin on my mom's shortbread cookie dough, which is notorious for sticking, and I had absolutely no problems after I dusted the dough with flour. The print stayed clear and crisp even after baking, and I got so many compliments on the cookies! The other thing was these rolling pins are incredibly easy to clean. A quick wipe with a damp cloth took off the flour from the external surface, while anything stuck in the crannies (I had maybe 2 clumps) I let dry and brushed off with a pastry brush. The pin is so beautiful it stays on my counter permanently and because the beech wood of the embossed rolling pin is not stained or treated (they are 100% food-safe and free of BPA or any other toxic substances) I don't have to worry about it discolouring, flaking, leaching or otherwise looking sad and forlorn. I am currently looking at finding an easel stand for it so it can be in the pride of place.
If you love beauty and function in a simple and easy to use package, I highly recommend one of these rolling pins from Embossed. You can also feel great knowing you're supporting a small business invested in making beautiful things for the every day person that will last a lifetime!
Please look below for more info:
How to use the rolling pin
FAQs about Embossed
Subscribe to:
Posts
(
Atom
)


